Task 4 - Integrations
Intro
Microservices commonly require backing services to underpin their functionality. Examples include:
Data storage: To persist data in structured or semi-structured stores. Caching: To maximize performance by storing data in a cache, allowing subsequent similar requests to be satisfied more quickly. Messaging: To ensure reliable communication under high network traffic or challenging conditions by persisting and distributing messages via data queues.
In this section we shall use Redis for Output Caching. Redis is an open-source in-memory database used for caching enabling faster access to data.
The Redis functionality is deployed in a Container and so Docker Desktop needs to be installed.
Redis Integration
To use .NET Aspire integrations, two Nuget packages need to be added to our solution. The first is for orchestration and the second is to integrate with the functionality.
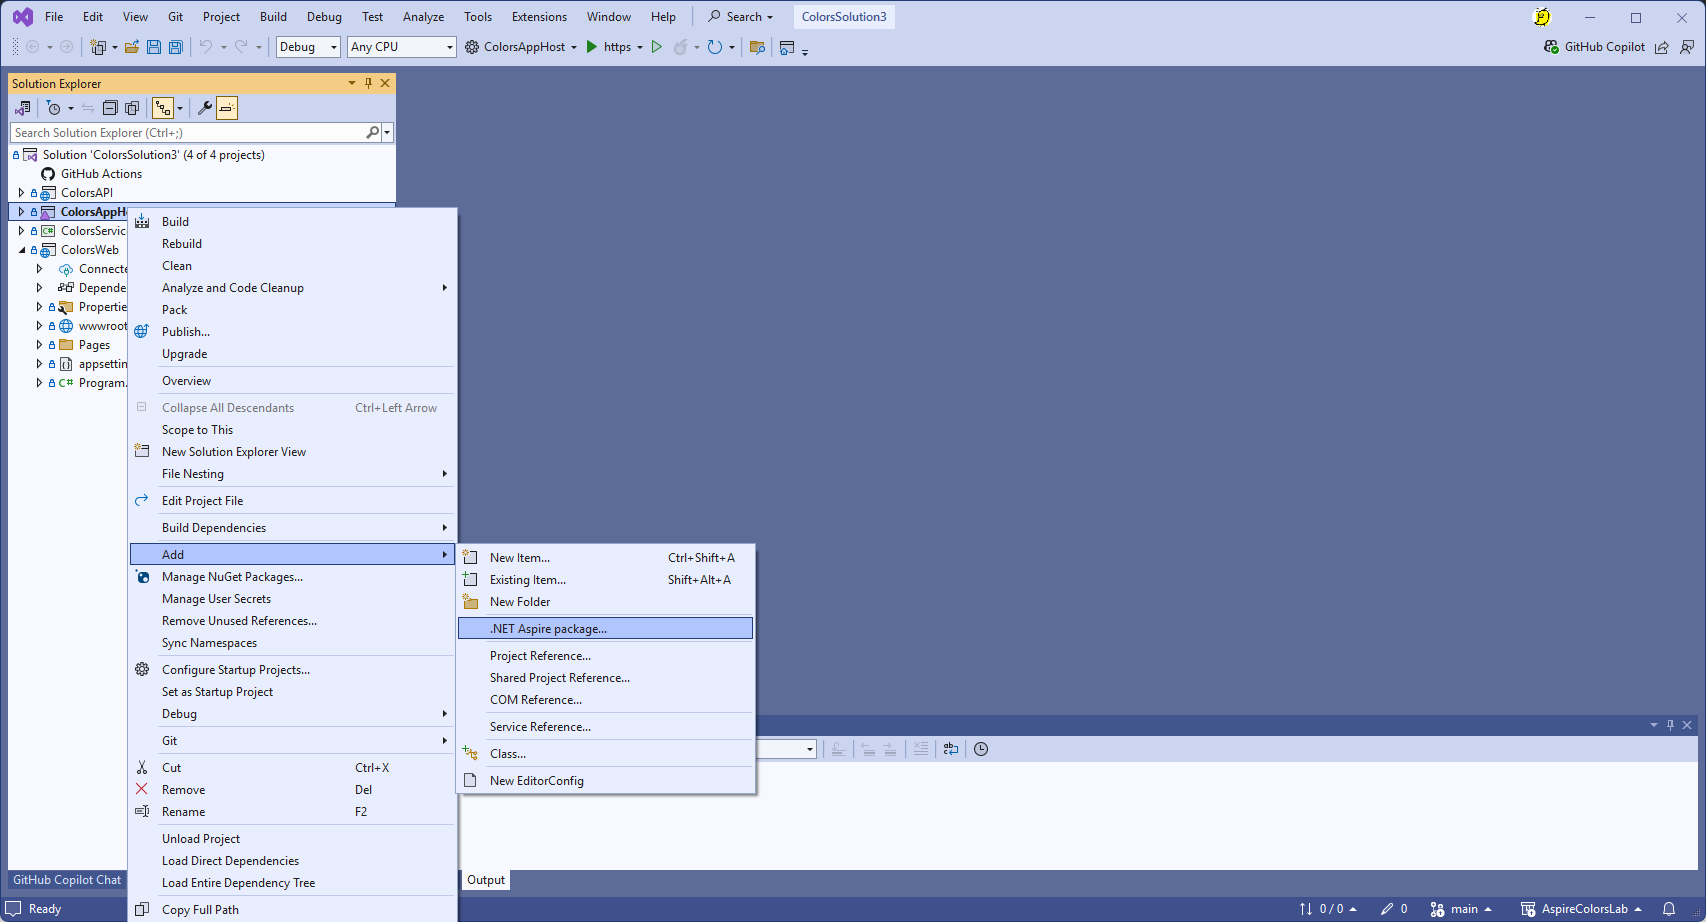
- Right click on the ColorsAppHost project, to Add .NET Aspire package.
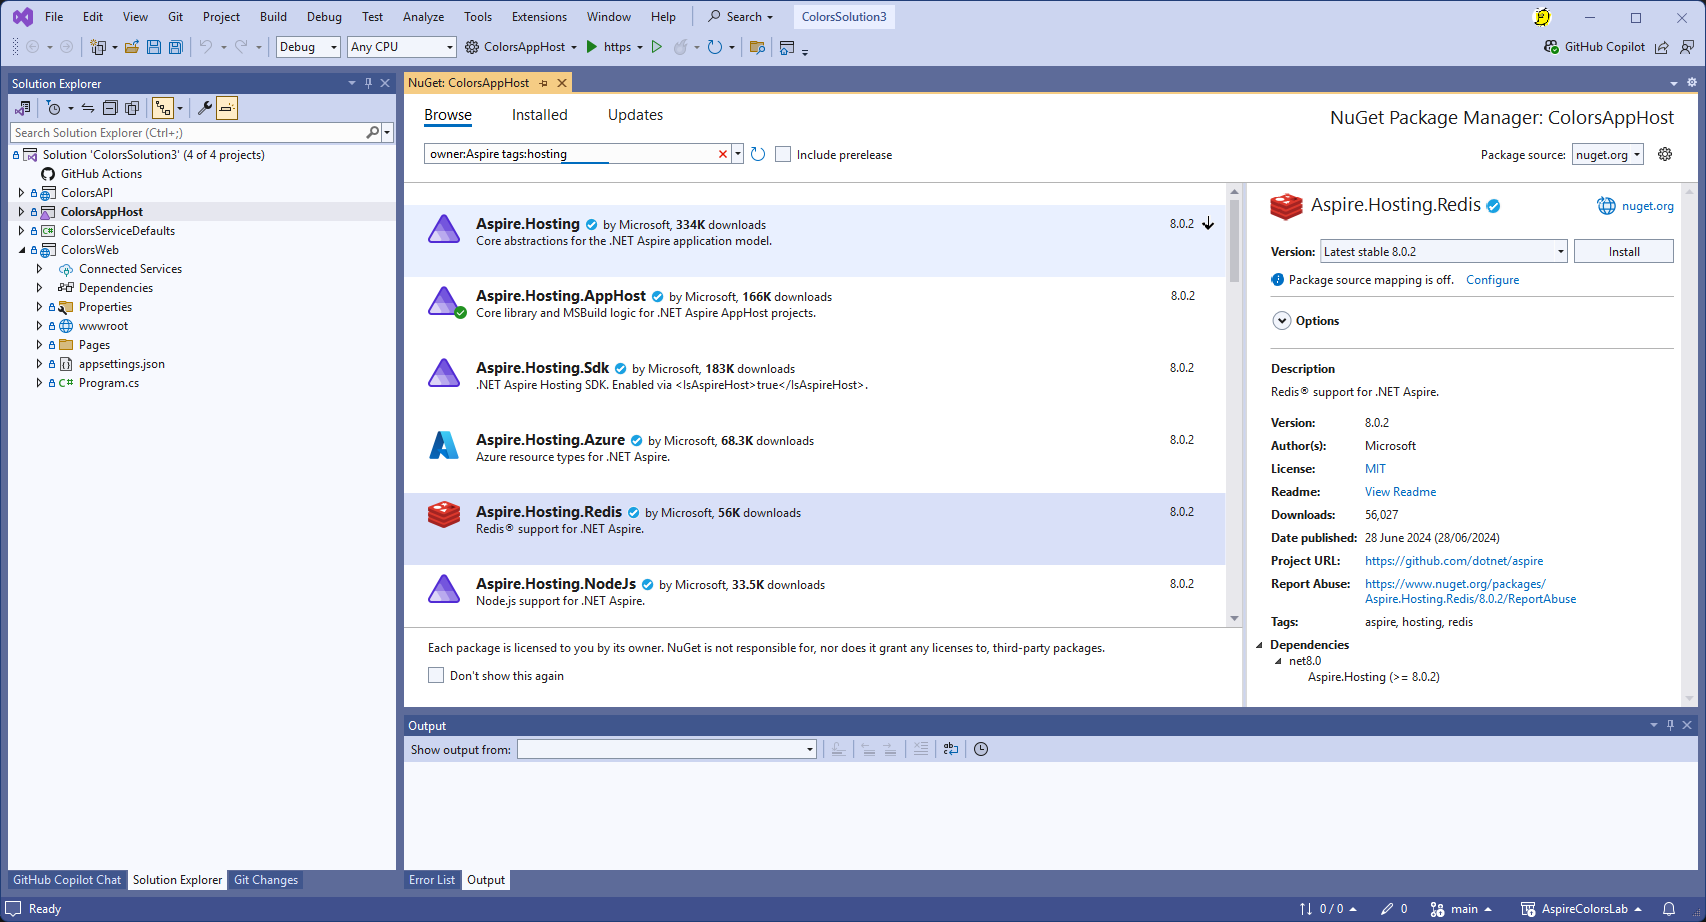
- Select 'Aspire.Hosting.Redis' , select [Install] and accept the subsequent dialog boxes.
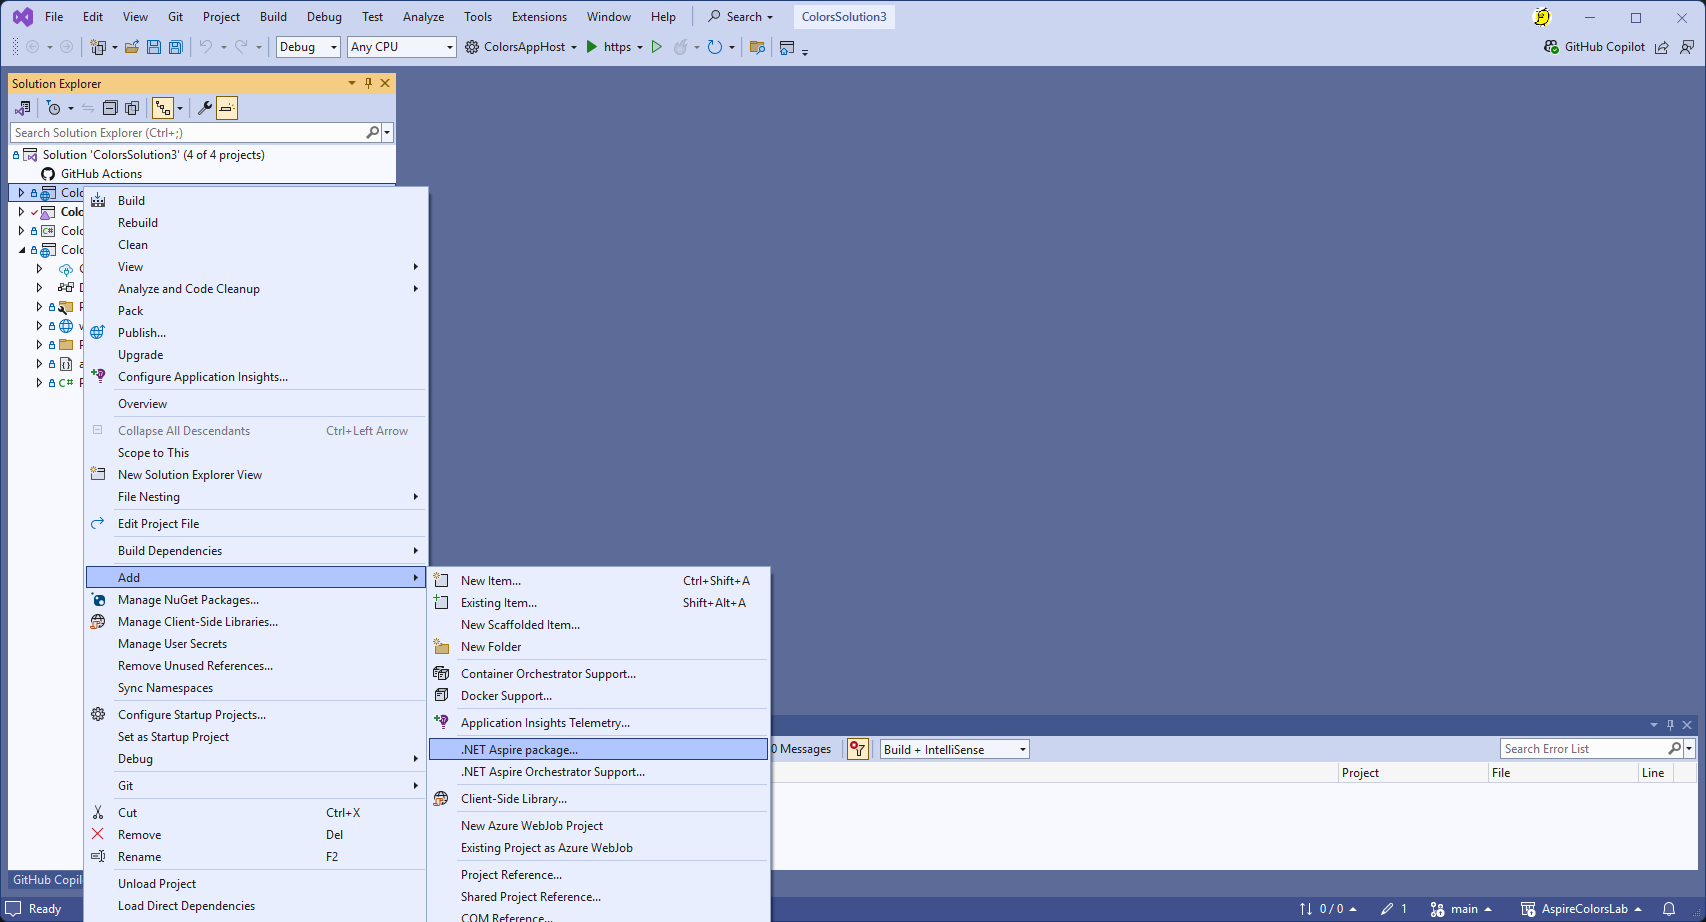
- Right click on the ColorsAPI project, to Add .NET Aspire package.
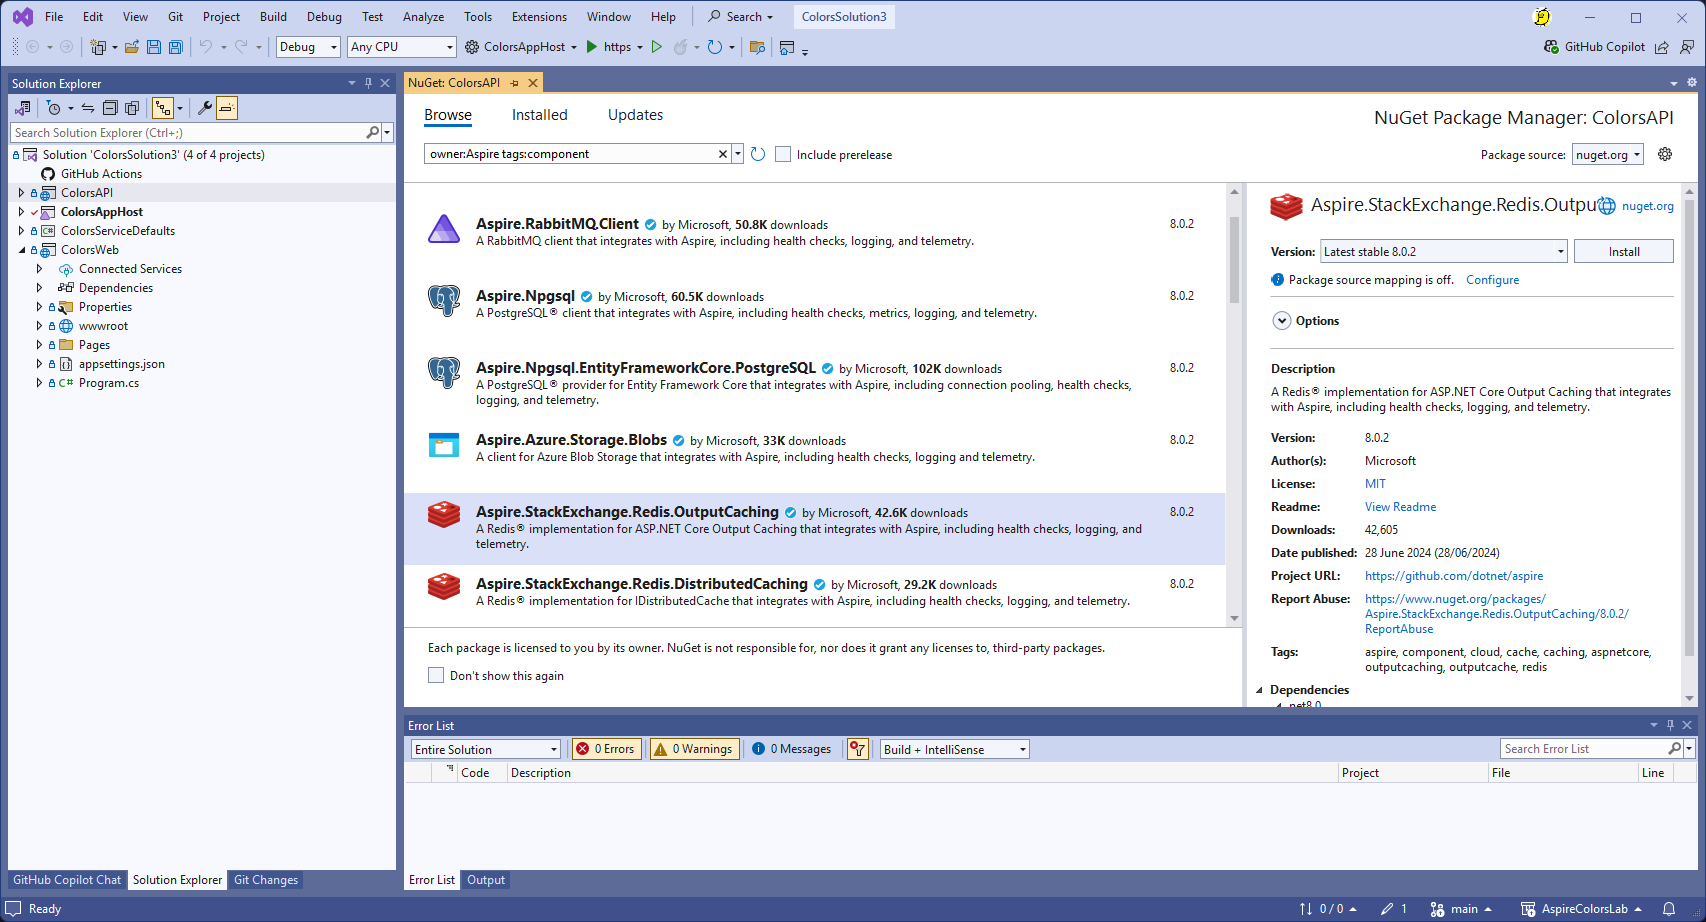
- Select 'Aspire.StackExchange.Redis.OutputCaching', select [Install] and accept the subsequent dialog boxes.
- Check both Nuget packages are now in the dependencies.
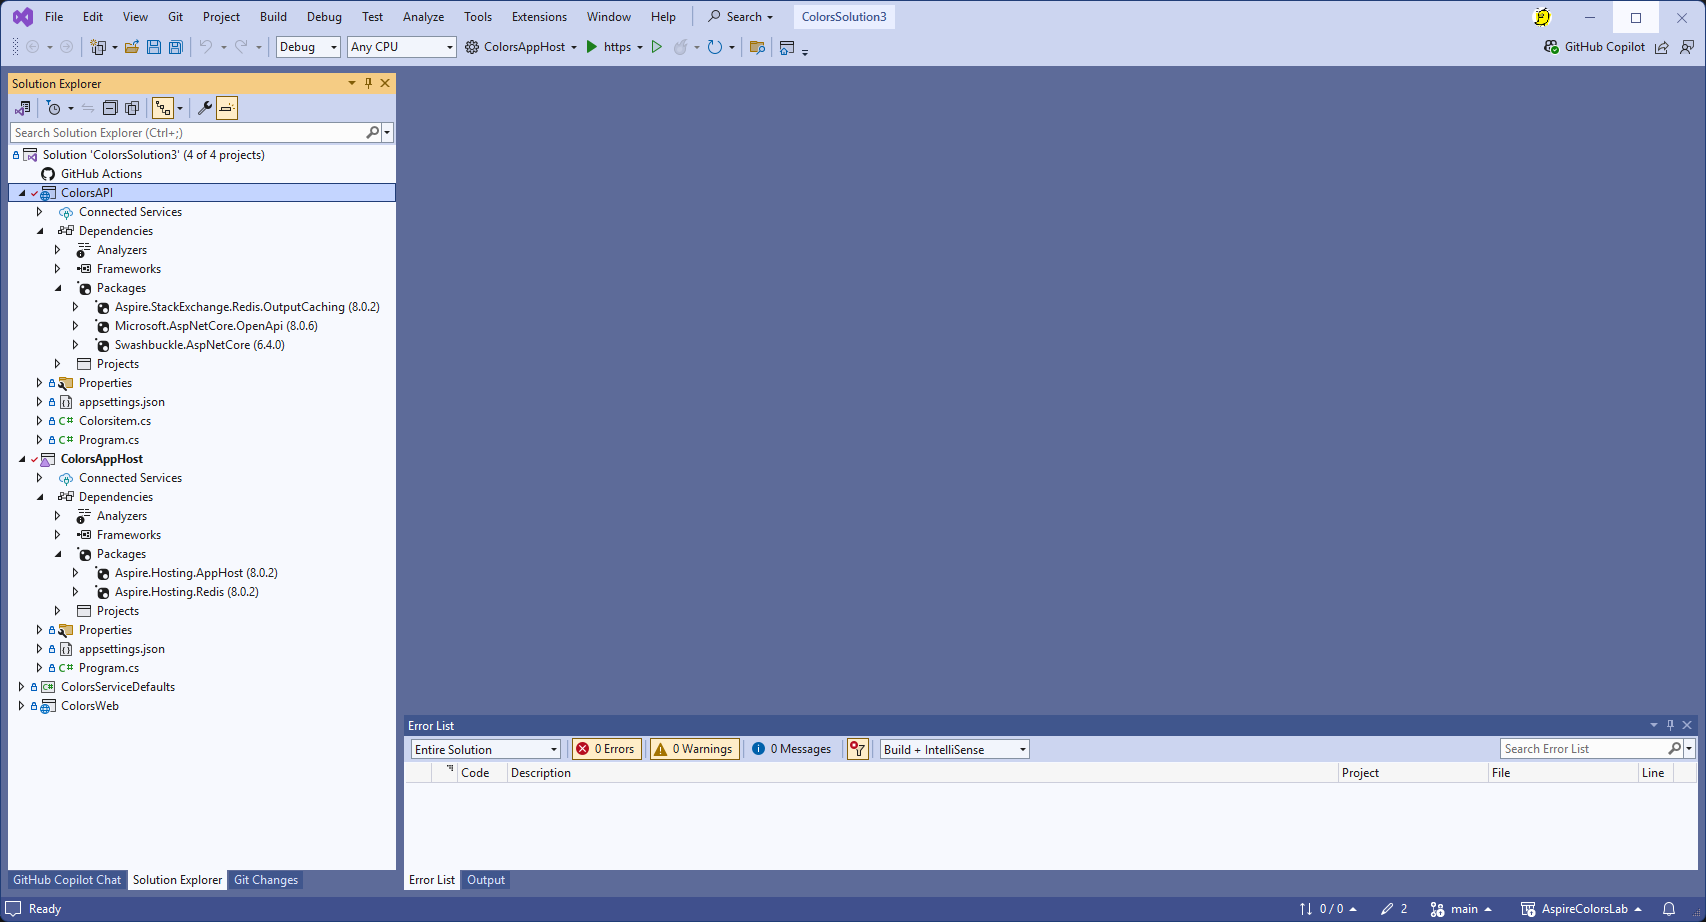
Add code to application
Let's add the code to include Redis in the orchestration and to inject a reference to Redis into the API application.
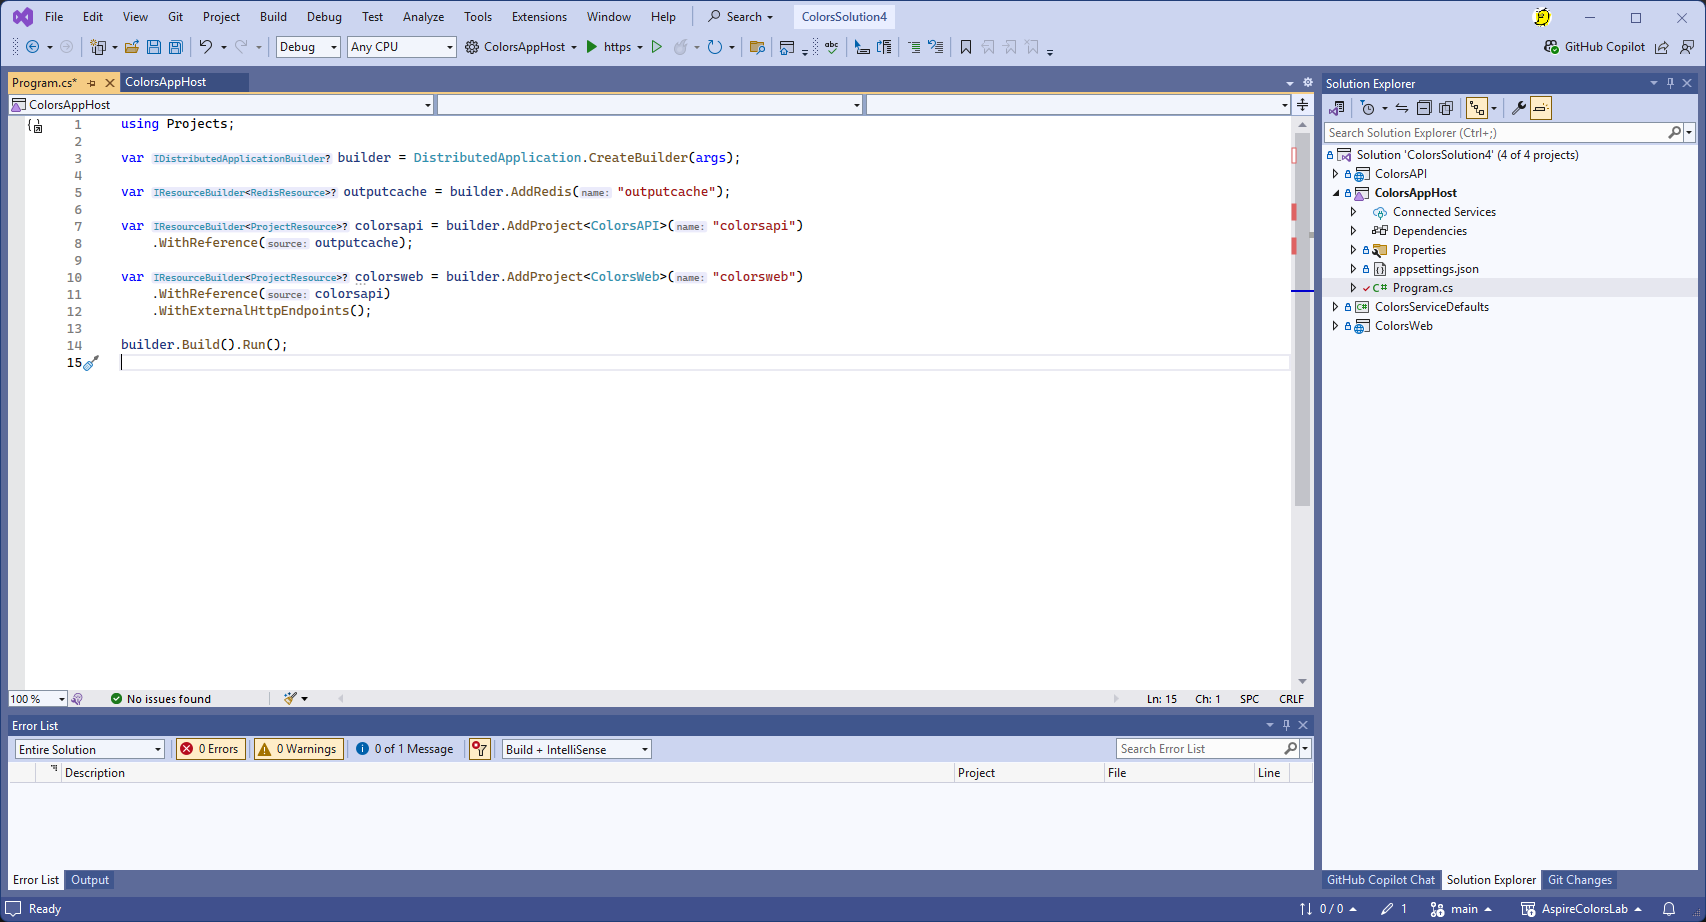
- Amend the 'Program.cs' file to the following:
using Projects;

var builder = DistributedApplication.CreateBuilder(args);

var outputcache = builder.AddRedis("outputcache");

var colorsapi = builder.AddProject<ColorsAPI>("colorsapi")
    .WithReference(outputcache);

var colorsweb = builder.AddProject<ColorsWeb>("colorsweb")
    .WithReference(colorsapi)
    .WithExternalHttpEndpoints();

builder.Build().Run();
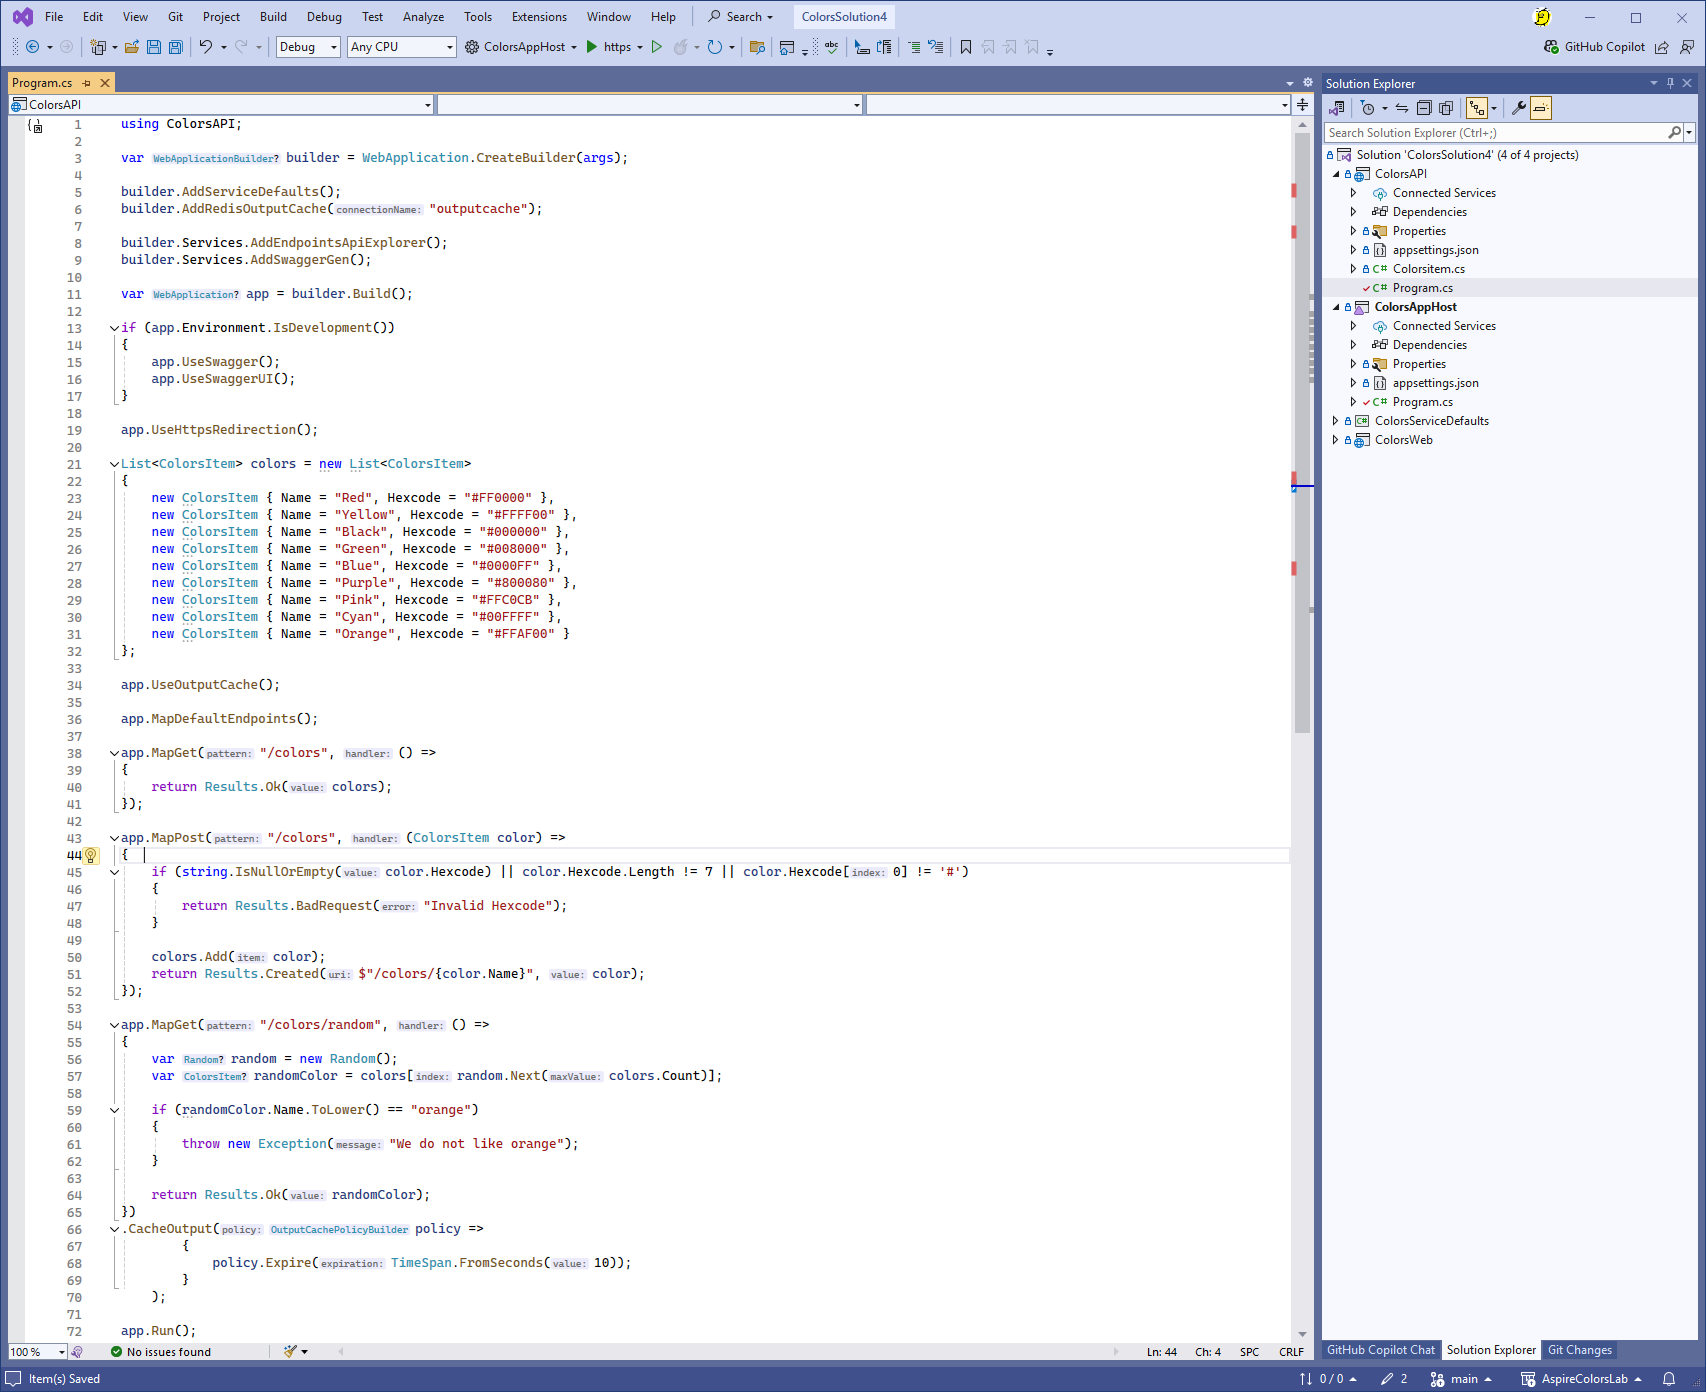
Next amend the API application to use output caching.
- After
builder.AddServiceDefaultsadd:
builder.AddRedisOutputCache("outputcache");
- Before
app.MapDefaultEndpoints();add:
app.UseOutputCache();
- Append after
app.MapGetfor the Random Color route to include:
.CacheOutput(policy =>
        {
            policy.Expire(TimeSpan.FromSeconds(10));
        }
    );
Test output caching
- Run the solution (make sure Docker Desktop is running)
We can see the Developer Dashboard now includes the outputcache Container in the list of resources
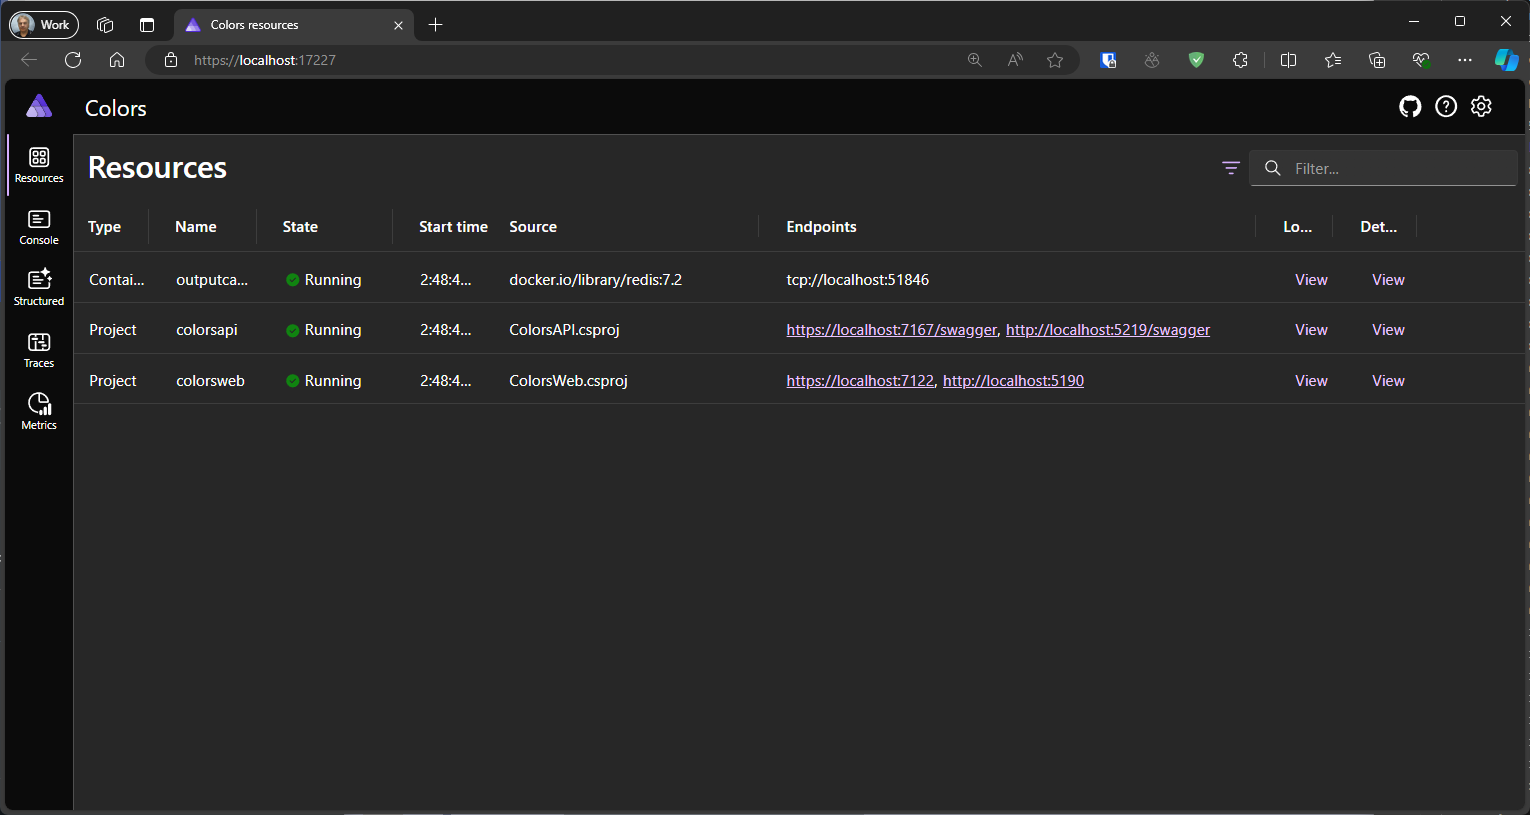
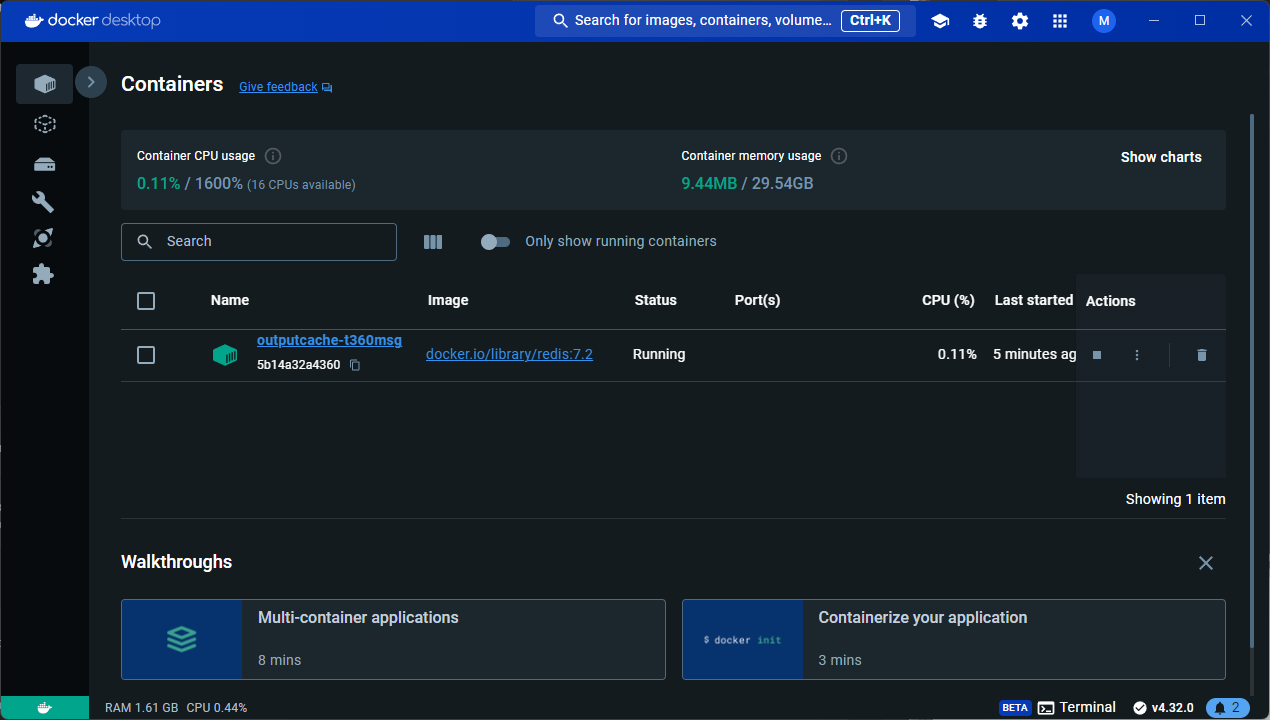
Also can see the outputcache is running in Docker Desktop.
-
Click on the Web application endpoint
-
Use the button to call the API
-
Notice that the color doesn't change for at least 10 seconds due to the caching.
- Always a chance that the next random color is the same as the previous color.
- There is a clock in the bottom left hand corner of the web page to help gauge 10 seconds.
Summary
In this section have added output caching using the Redis backing service for our application.
Our application is now complete and ready to deploy.