Task 5 - Deployment
Intro
Currently, .NET Aspire only supports deployment to Azure Container Apps. This is what we will use in this section.
Deploy to Azure Container Apps
To deploy our application to Azure Container Apps we shall use the Azure Developer CLI which is an open-source tool that makes it easy to get an application from a local development environment to Azure. If AZD is not installed, use WinGet as follows:
winget install Microsoft.Azd
Logon to Azure
Enter the following. This will fire up a browser instance to authenticate with Azure credentials.
azd auth login

Intialize the application
Enter the following. AZD will scan the application and detect that it is a .NET Aspire application. It will ask for an environment name that will be used for the Resource Group in Azure.
azd init

Check out the files generated: 'azure.yaml' and 'next-steps.md'. The first is used by AZD and the second is some documentation on how to use AZD.
Provision the infrastructure
- Enter the following. This will create various Azure resources including Azure Container Apps environment.
azd provision
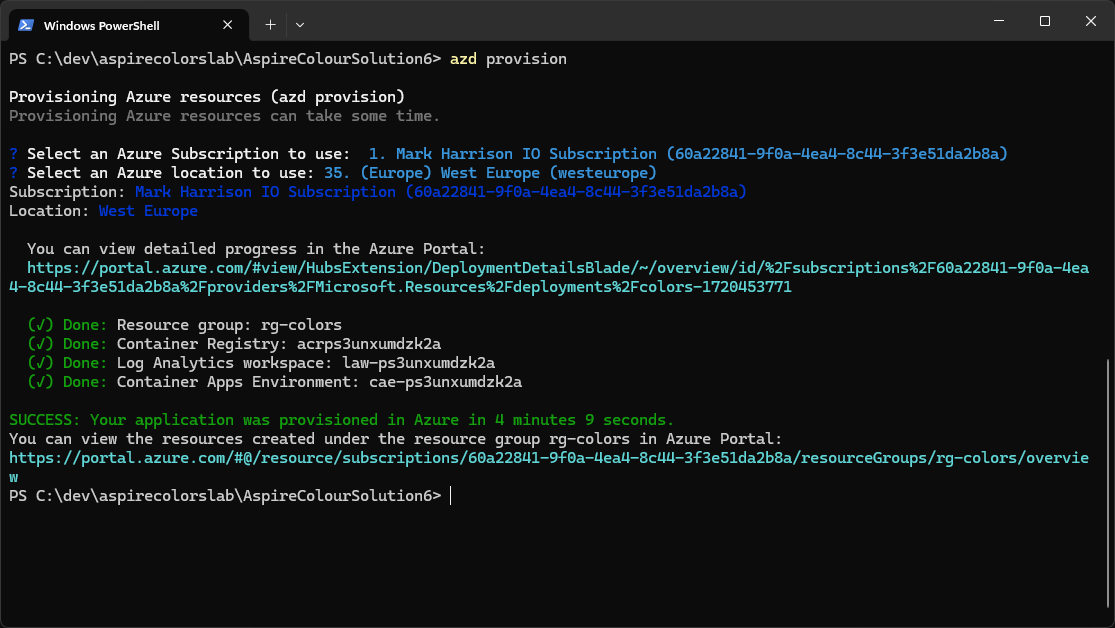
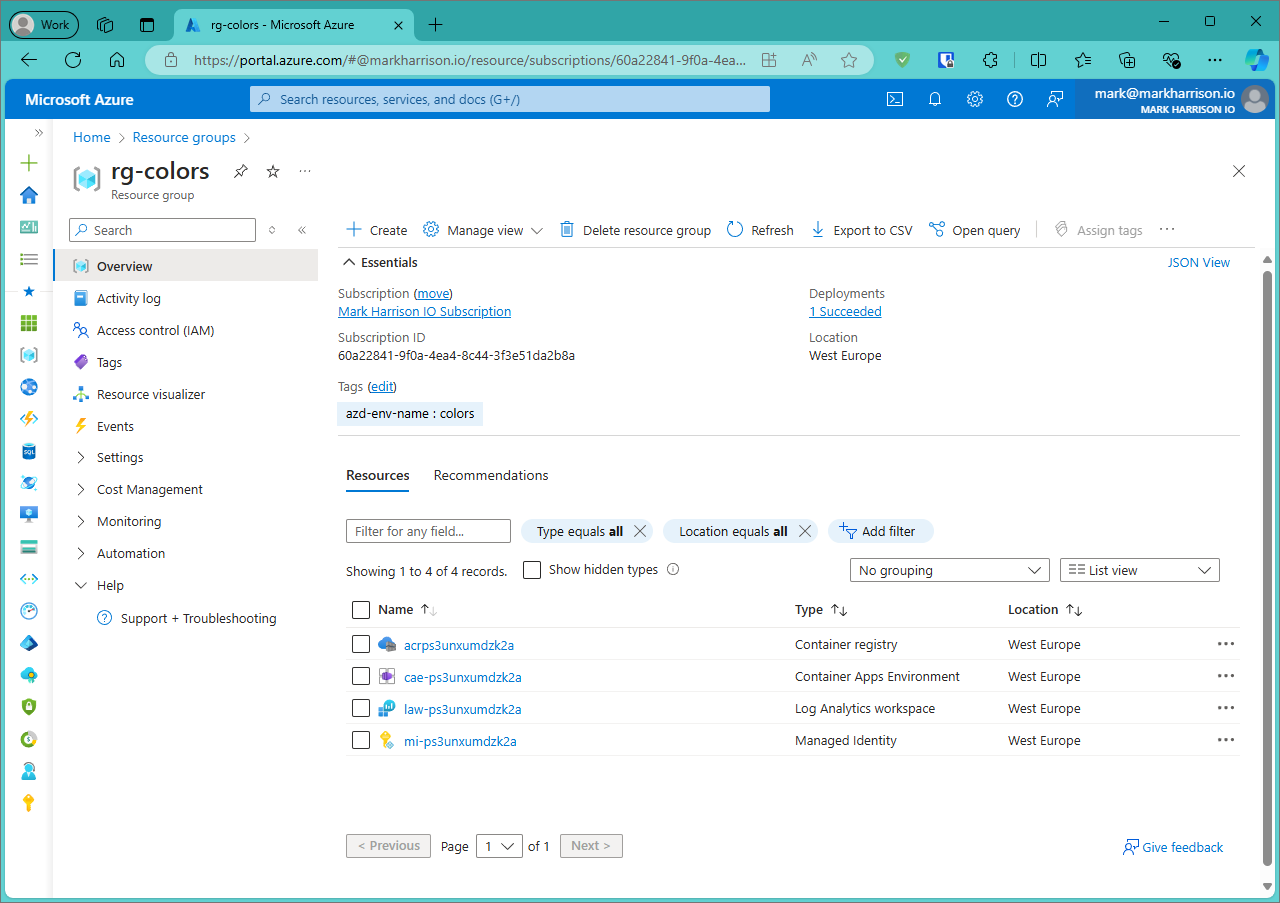
- Confirm the resources are created by checking in the Azure Management Portal.
Deploy the application
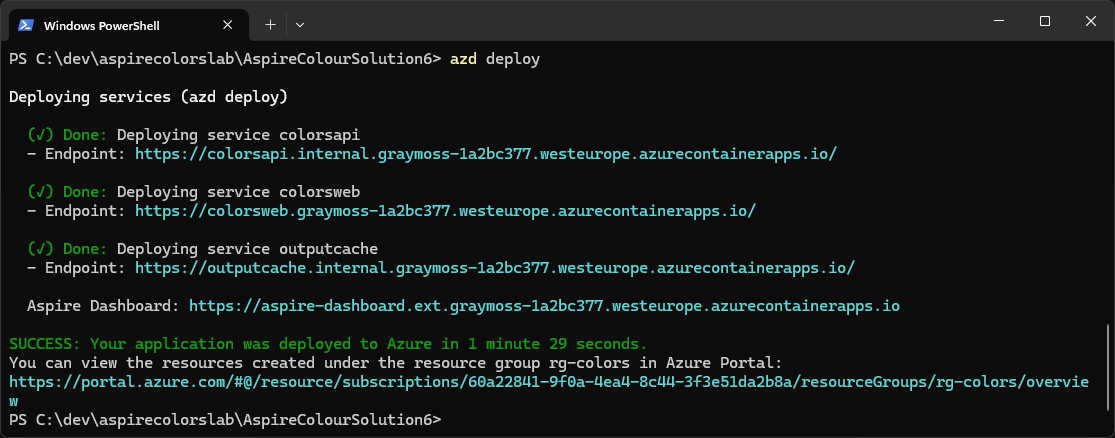
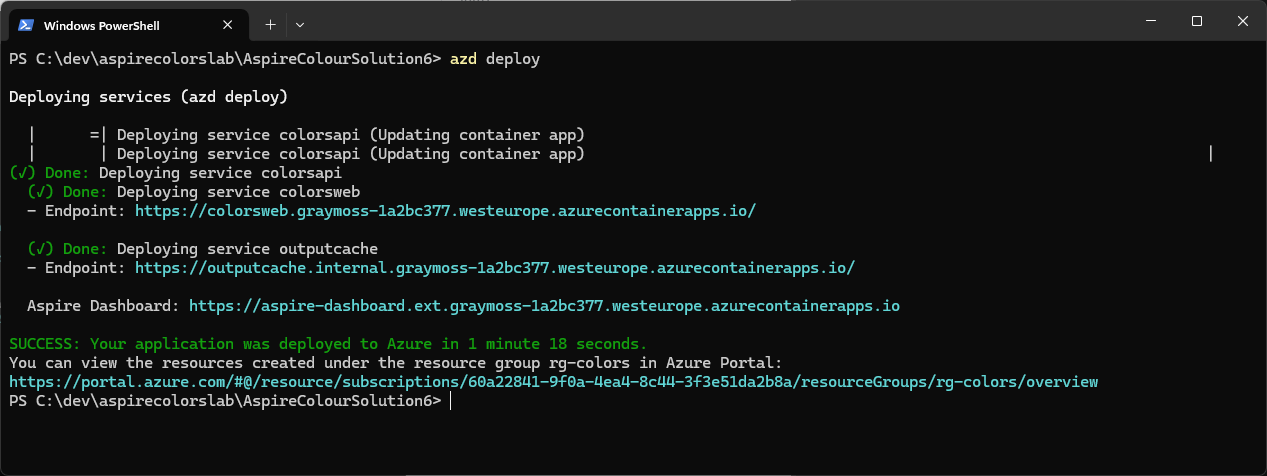
- Enter the following. This will build containers in the Azure Container Registry and deploy the containers to the Azure Container Apps environment.
azd deploy
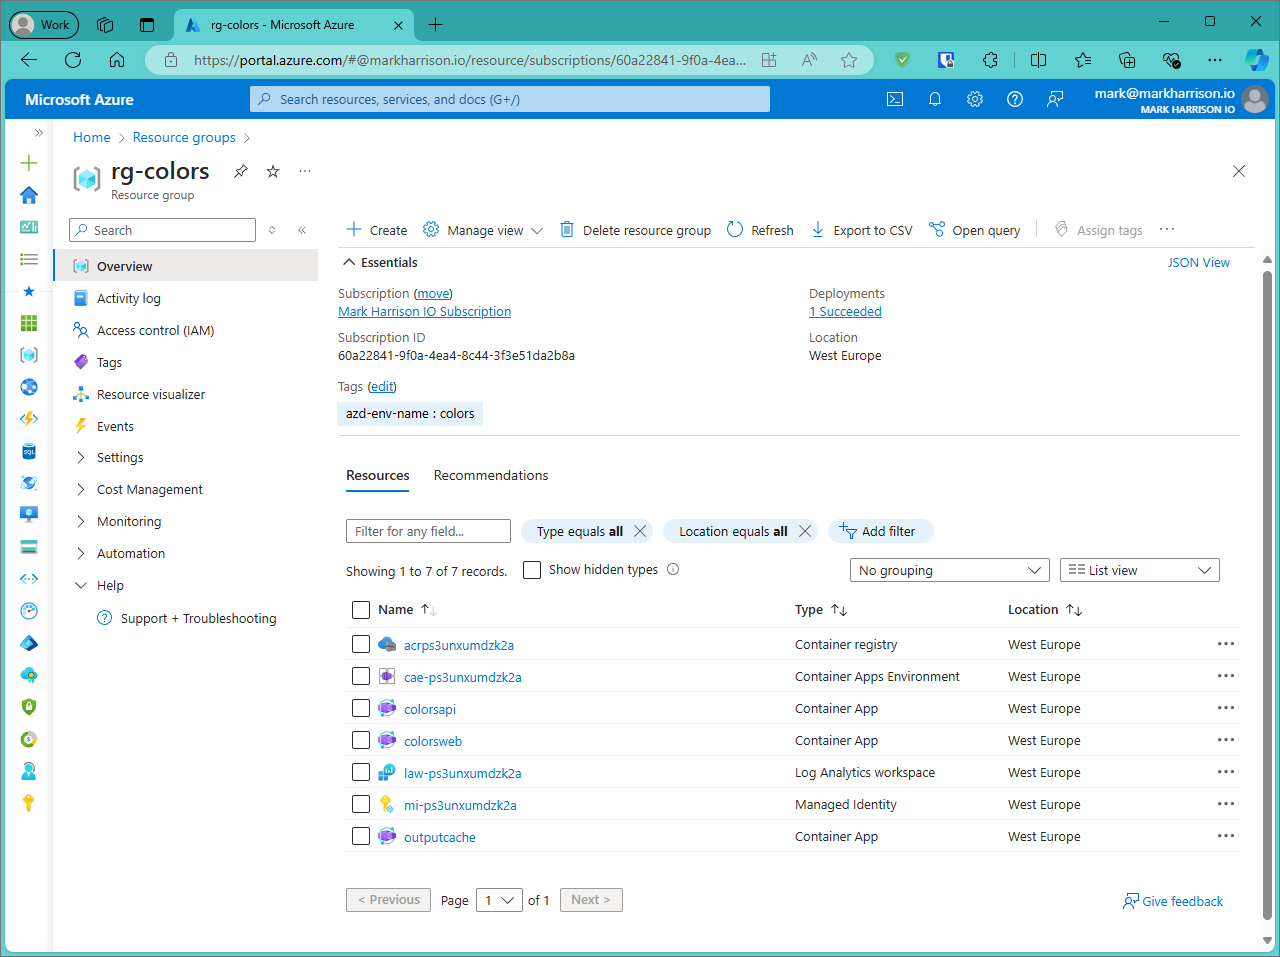
We can confirm the additional resources were created by checking in the Azure Management Portal.
Run the application
Access the Web application endpoint using the information returned from AZD. In the above screenshot - it is at https://colorsweb.graymoss-1a2bc377.westeurope.azurecontainerapps.io/
- Confirm that the application still works and the API is being called successfully.

-
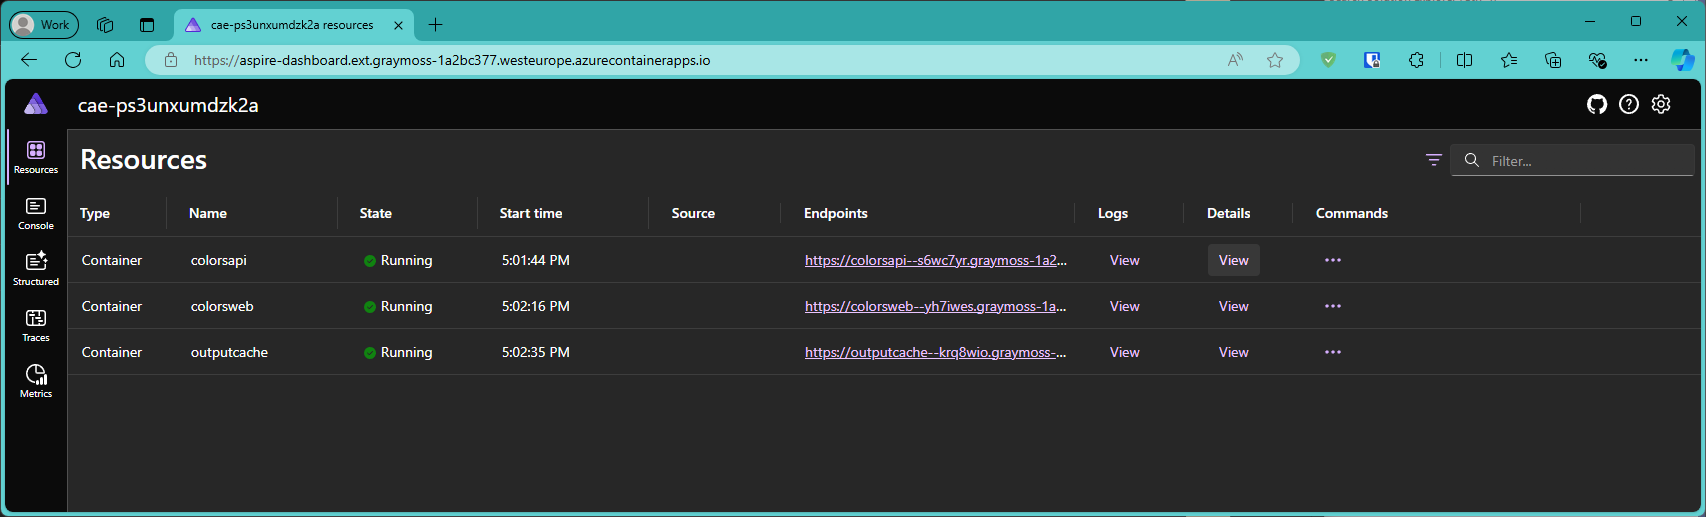
Confirm the Developer Dashboard is available - it will need authentication to access.
-
A link to the Developer Dashboard is on the Overview screen of the Azure Container Apps Environment.
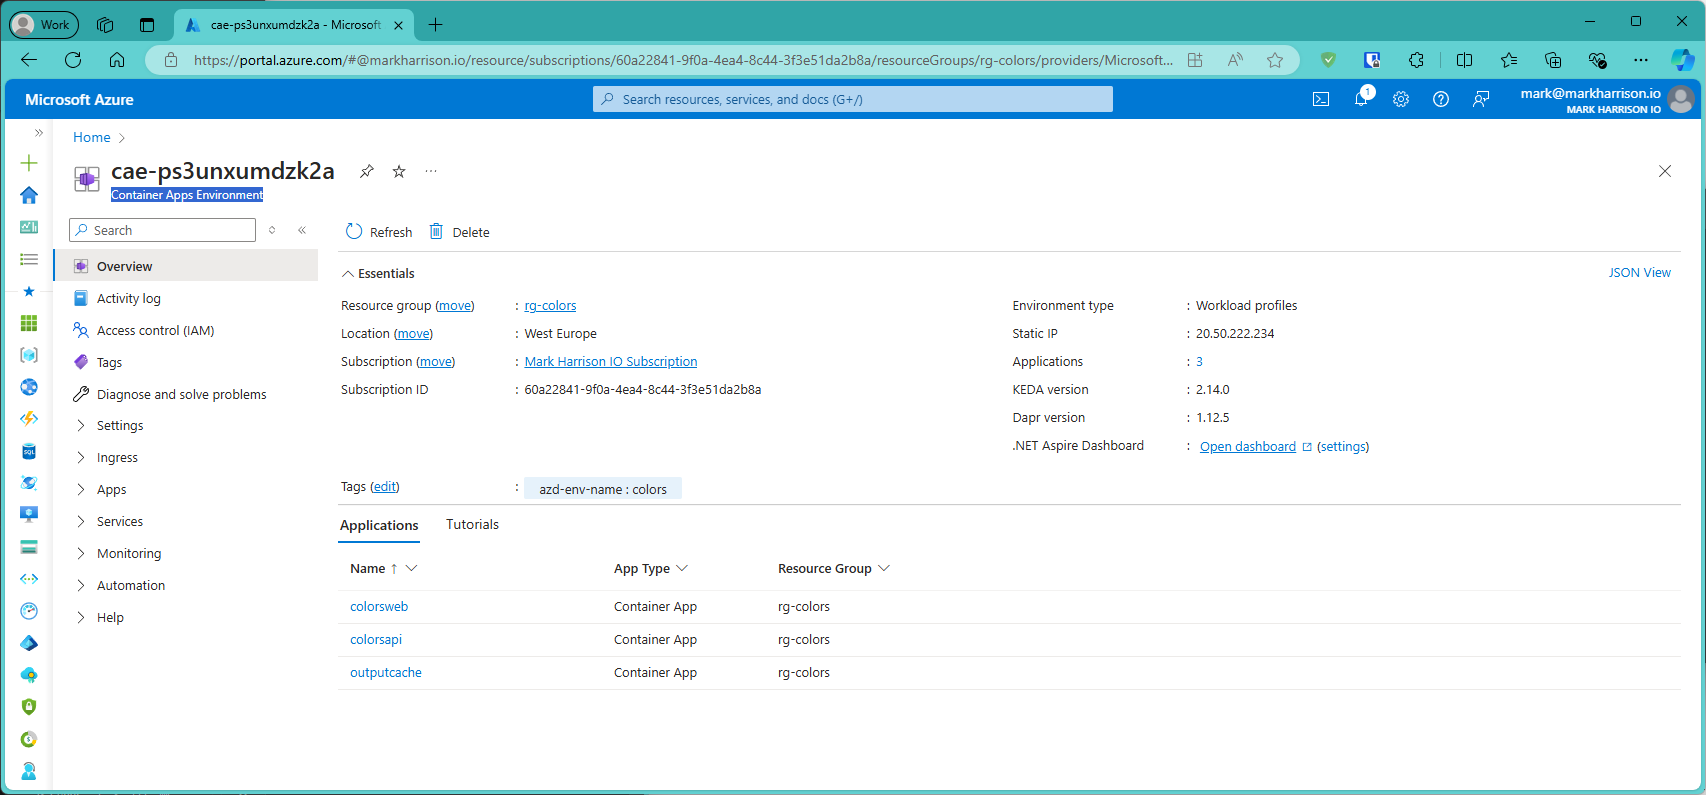
The Developer Dashboard is not intended for production use; let's now switch to something more suitable, namely Azure Monitor / Application Insights.
Use Azure Monitor / Application Insights
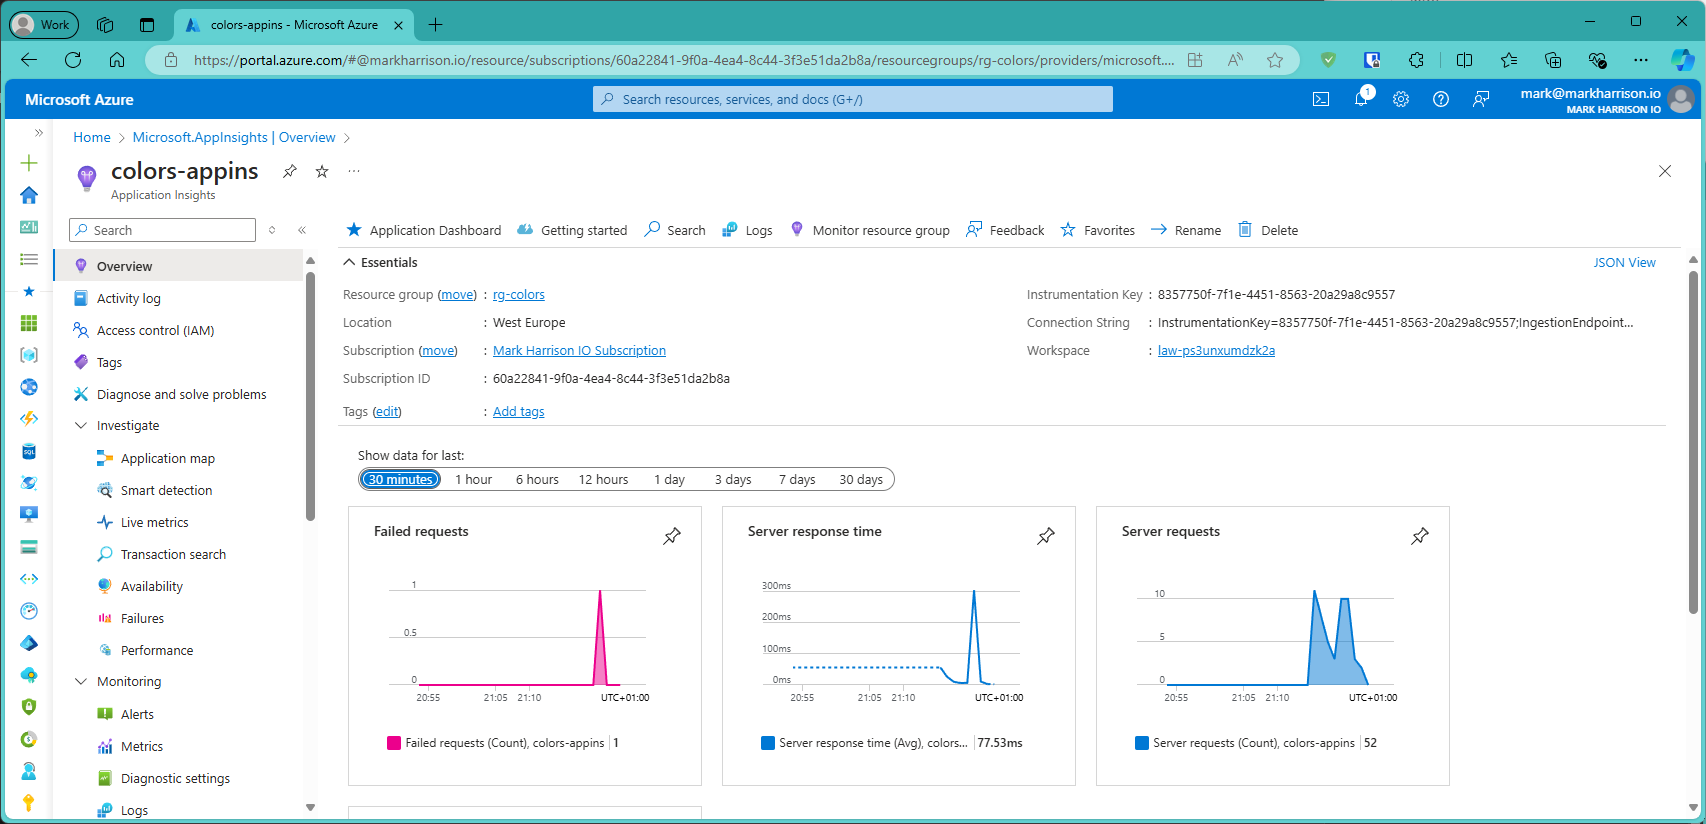
Create Application Insights Instance
- Create an Application Insights instance.
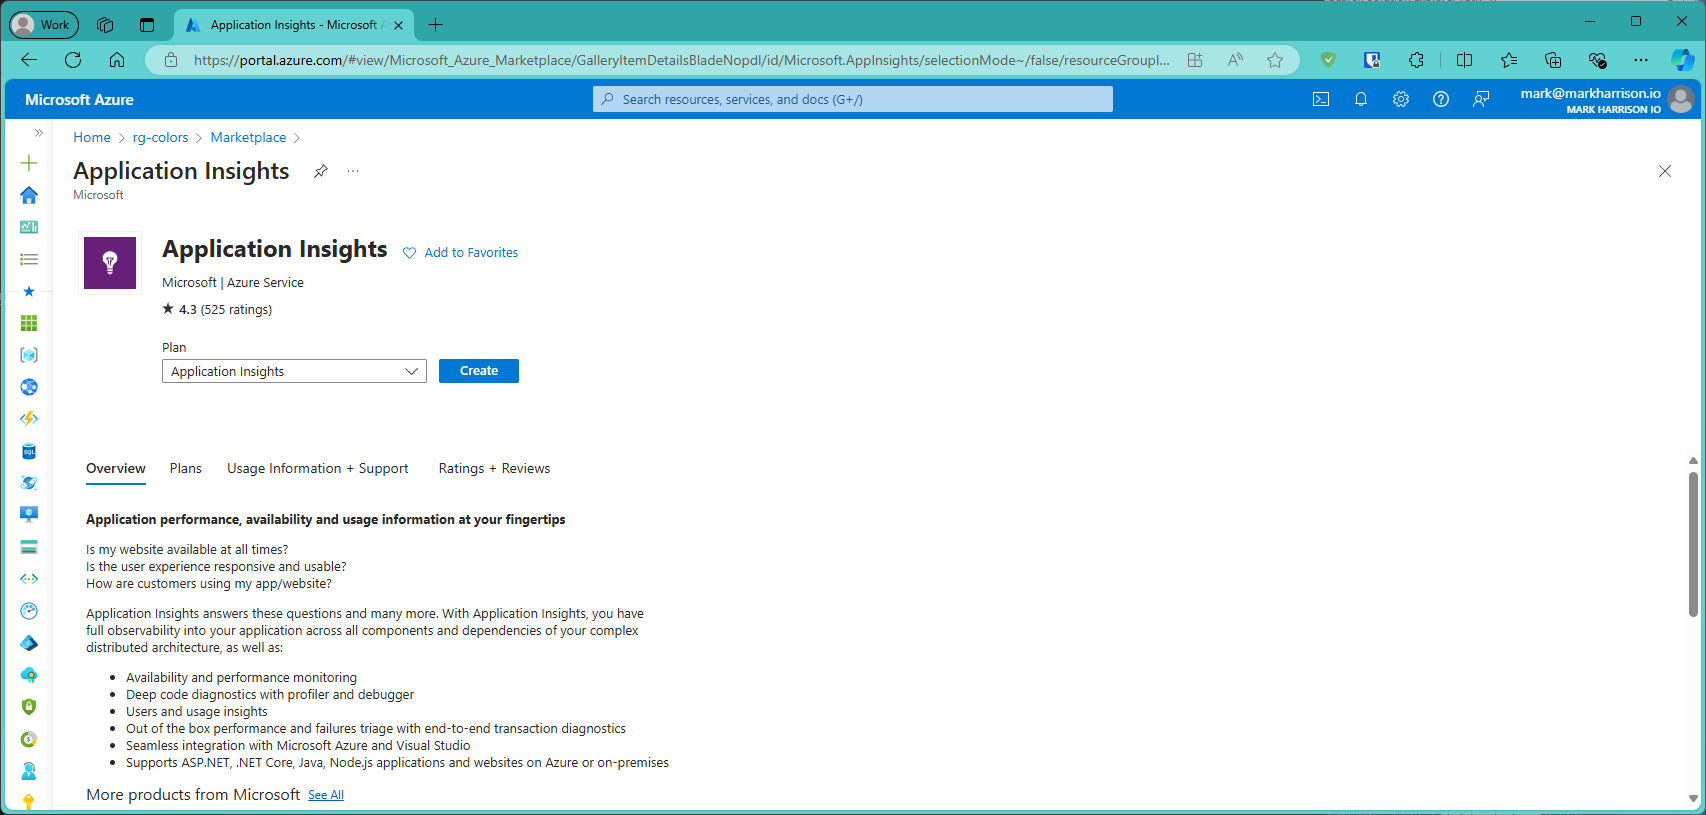
Use the existing Log Analytics Workspace that was created.


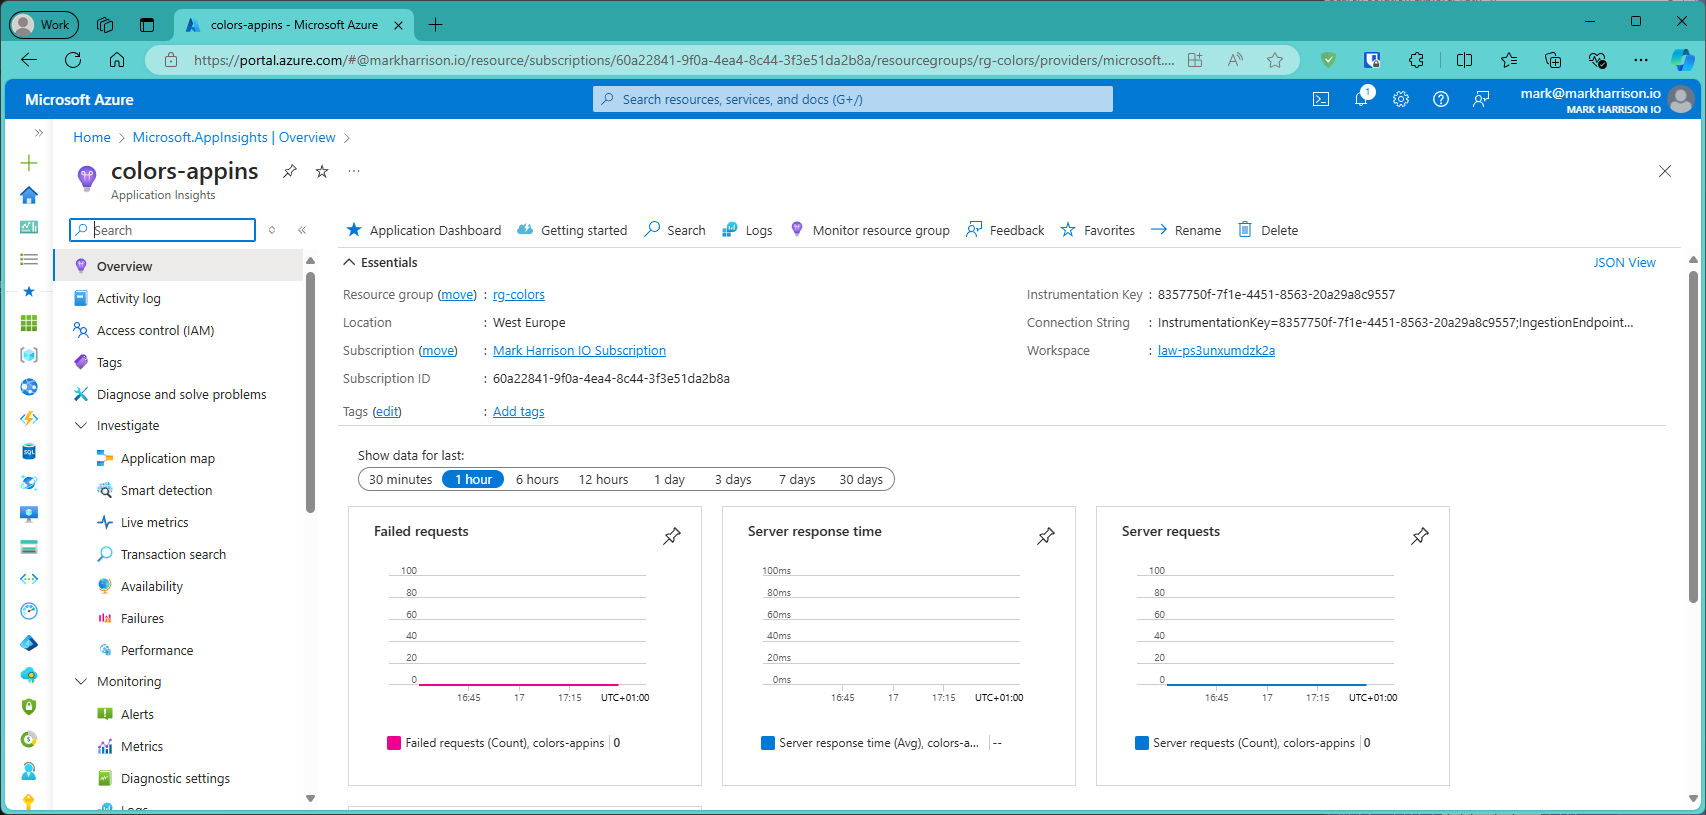
- Get the Application Insights 'connection string' from the overview page
Update Orchestration
We need to inject the Application Insights 'connection string' into the configuration.
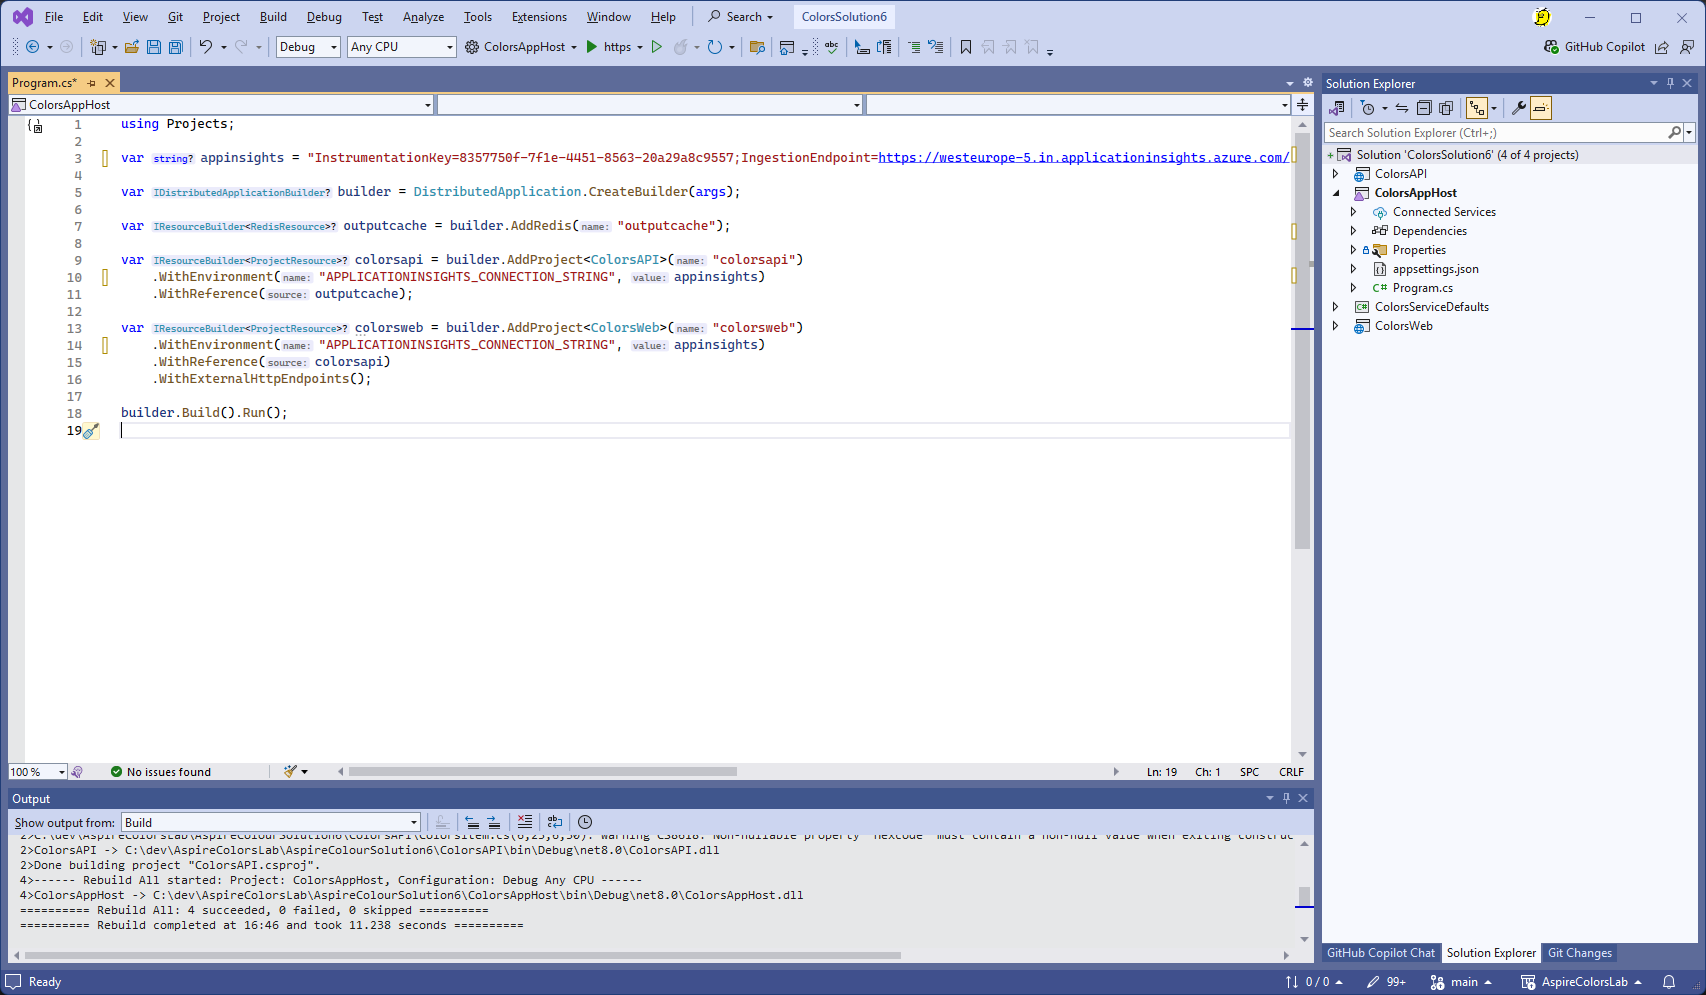
- Amend the 'program.cs' in ColorsAppHost to the following and make sure the 'connection string' is assigned to variable
appinsights:
using Projects;

var appinsights = "***insert connection string here***";

var builder = DistributedApplication.CreateBuilder(args);

var outputcache = builder.AddRedis("outputcache");

var colorsapi = builder.AddProject<ColorsAPI>("colorsapi")
    .WithEnvironment("APPLICATIONINSIGHTS_CONNECTION_STRING", appinsights)
    .WithReference(outputcache);

var colorsweb = builder.AddProject<ColorsWeb>("colorsweb")
    .WithEnvironment("APPLICATIONINSIGHTS_CONNECTION_STRING", appinsights)
    .WithReference(colorsapi)
    .WithExternalHttpEndpoints();

builder.Build().Run();
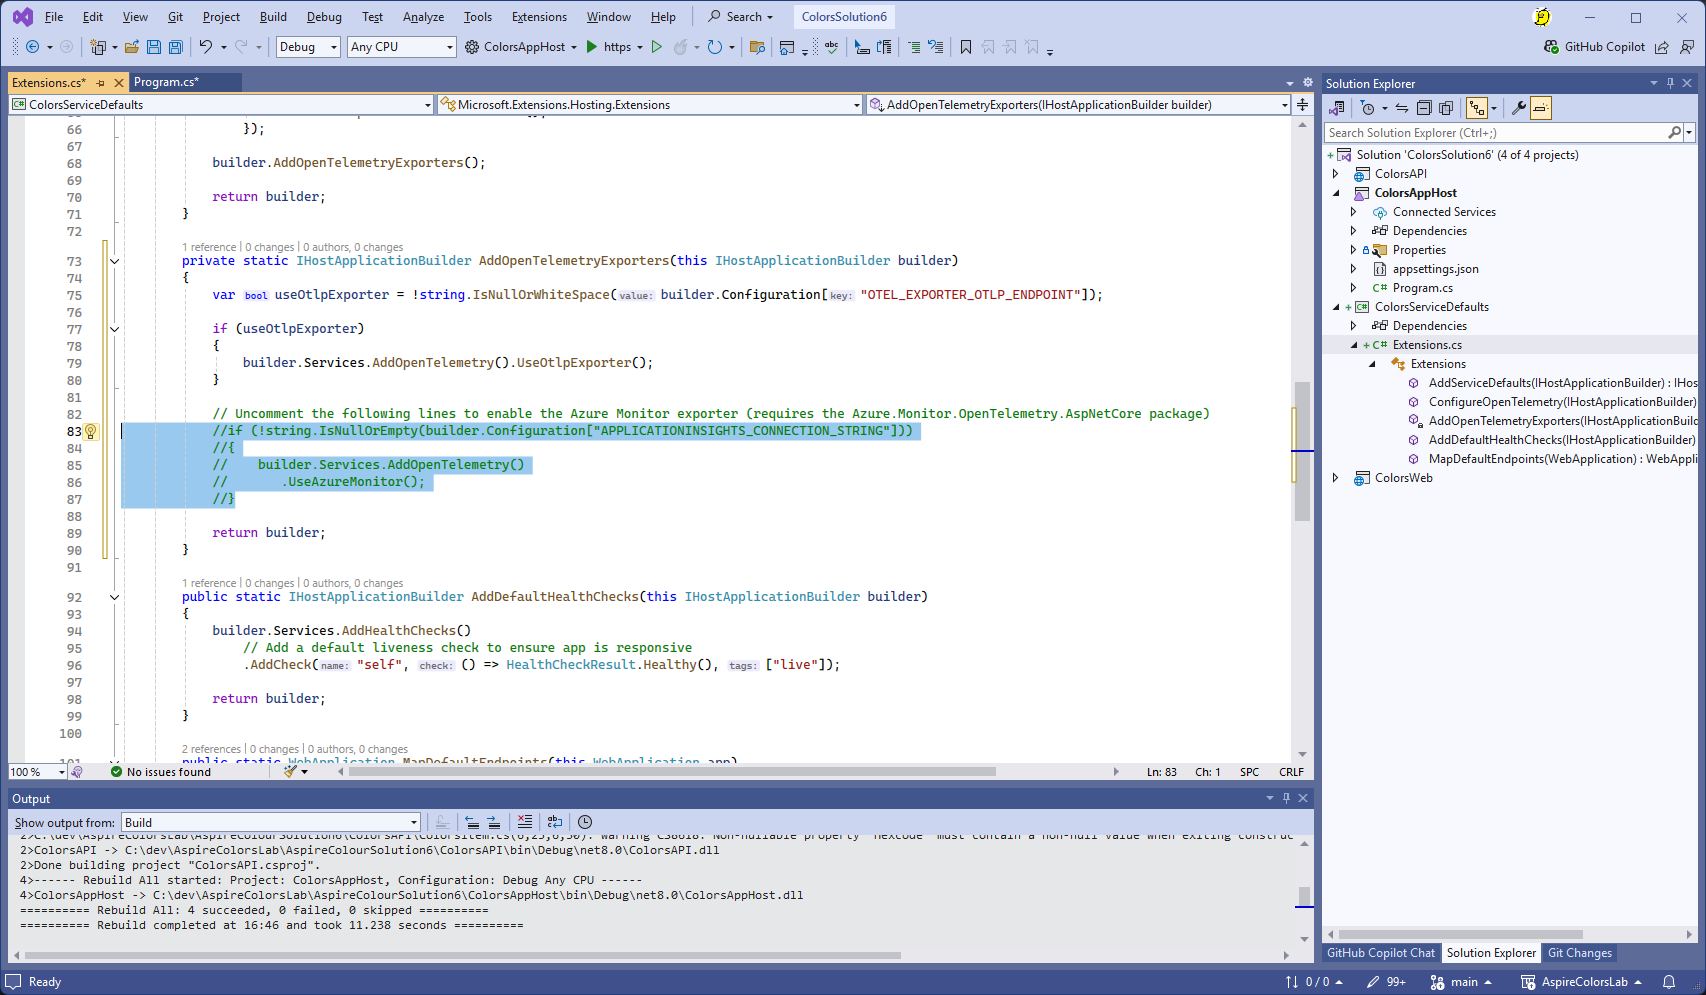
Update Service Defaults telemetry
-
In the ServiceDefaults project - find the
AddOpenTelemetryExportersfunction. -
Uncomment the lines that enable the Azure Monitor exporter
    if (!string.IsNullOrEmpty(builder.Configuration["APPLICATIONINSIGHTS_CONNECTION_STRING"]))
    {
        builder.Services.AddOpenTelemetry()
            .UseAzureMonitor();
    }
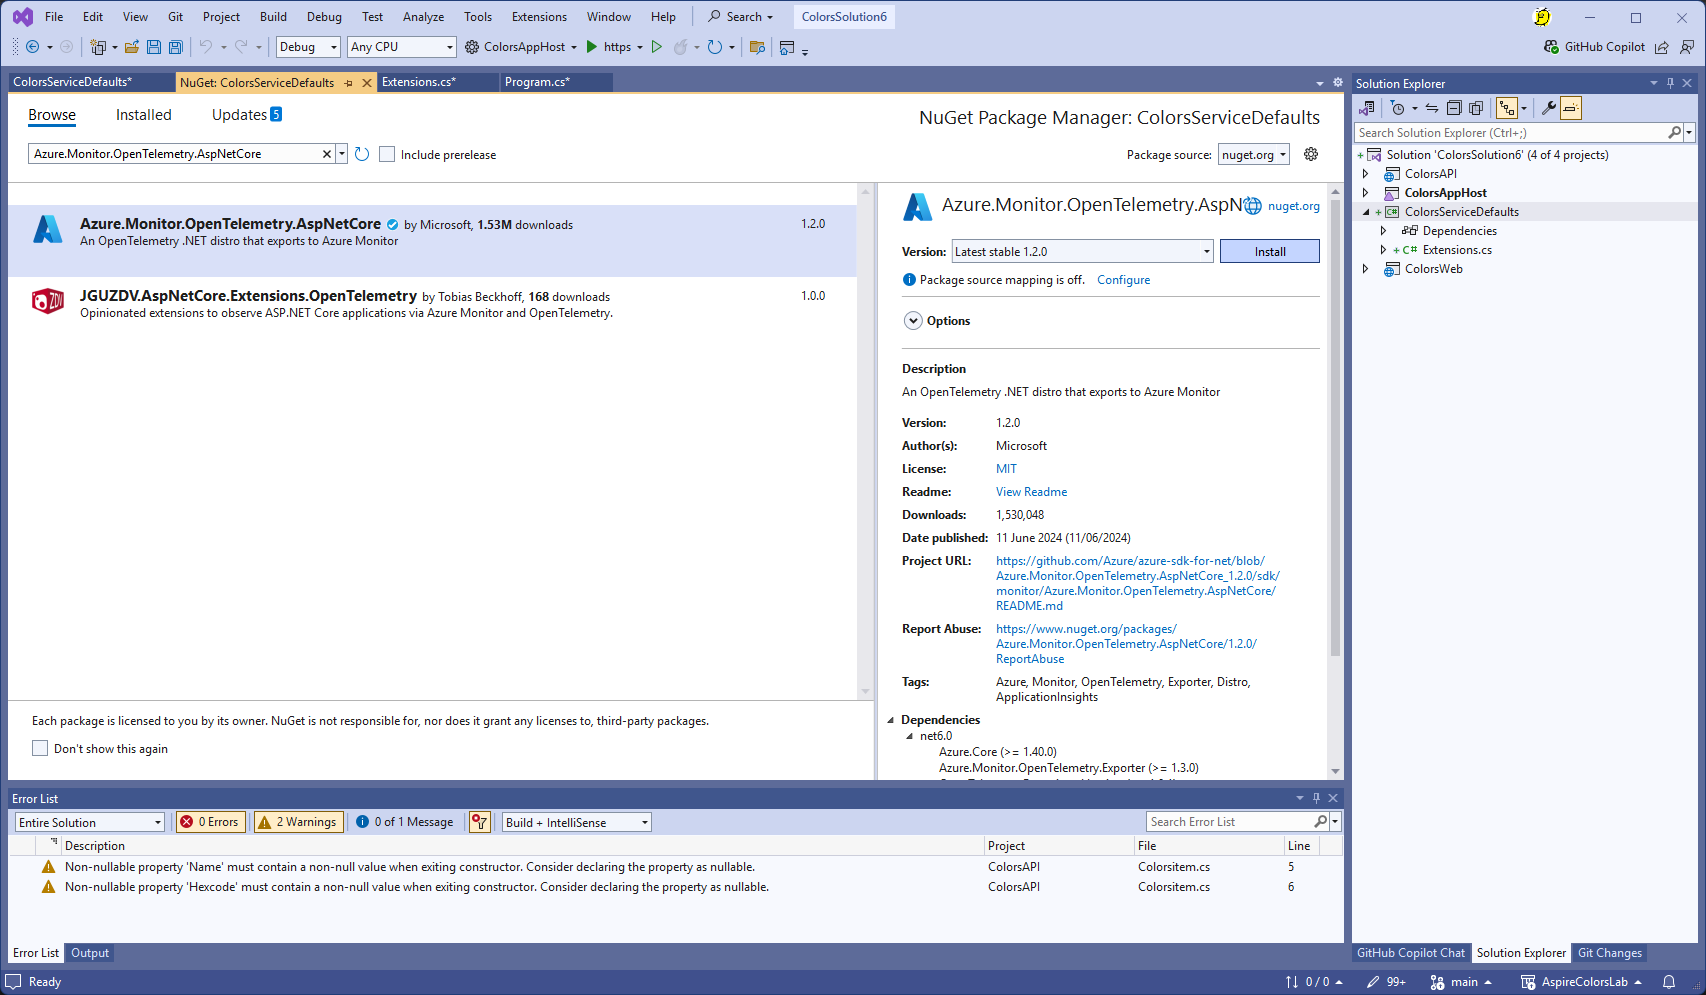
Need to add the Nuget package 'Azure.Monitor.OpenTelemetry.AspNetCore'.
- Right click on the ColorsServiceDefaults project and select [Manage Nuget Packages]

- Select 'Azure.Monitor.OpenTelemetry.AspNetCore', select [Install] and accept the subsequent dialog boxes.
Our application has now been updated to use Application Insights
Ensure Orange is listed as a color in the API's list of colors - we want to be able to see Exceptions logged to Application Insights.
new ColorsItem { Name = "Orange", Hexcode = "#FFAF00" }
Redeploy the application
- Redeploy the application, enter the following
azd deploy
Rerun the application
-
Run the application, browse to the Web Application endpoint.
-
Click the button a few times to generate data being sent to Application Insights.
-
Keep clicking until an Exception occurs - we can see that in the log.
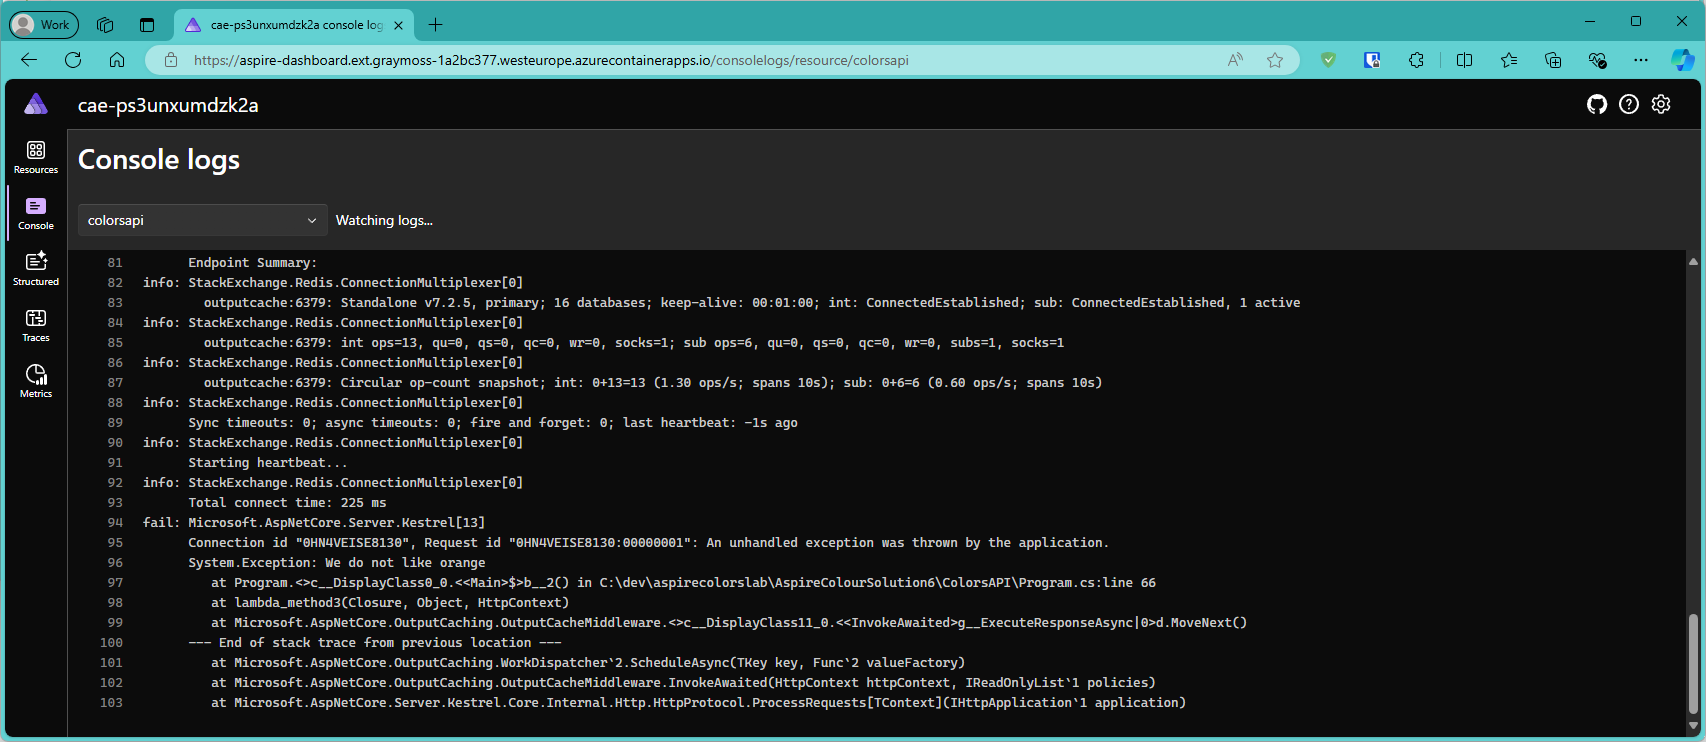
Examine Application Insights
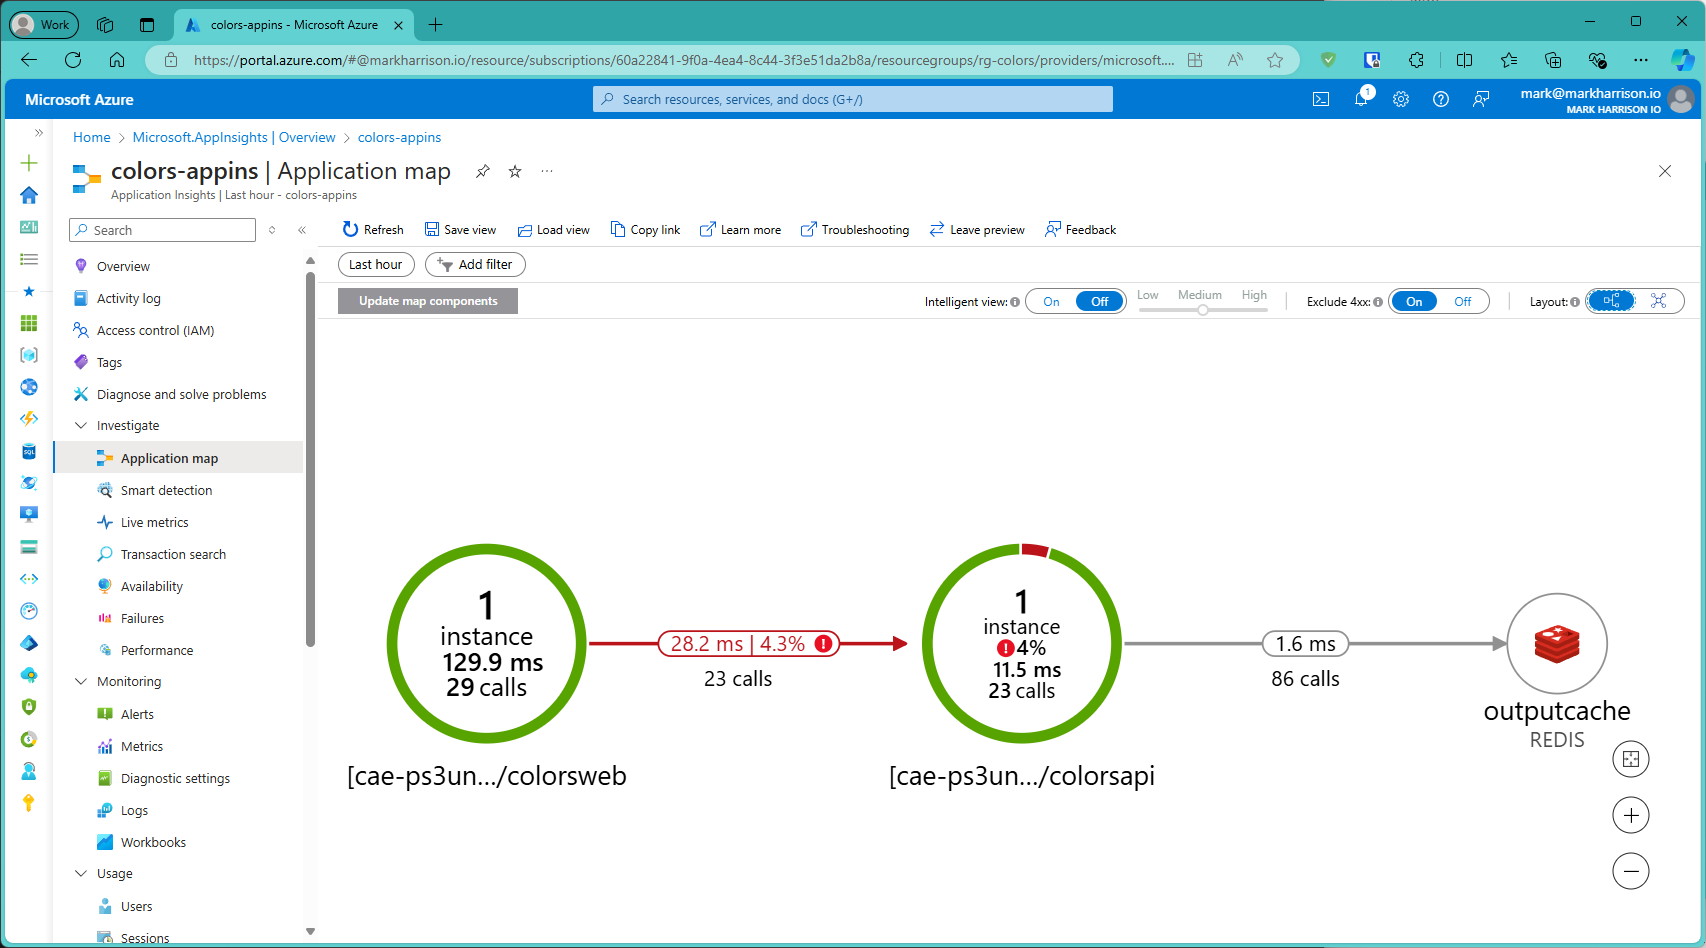
- Browse around the Application Insight to see the telemetry generated:
Application Map:
Look at failures - the Exception that occurs when Orange is generated:
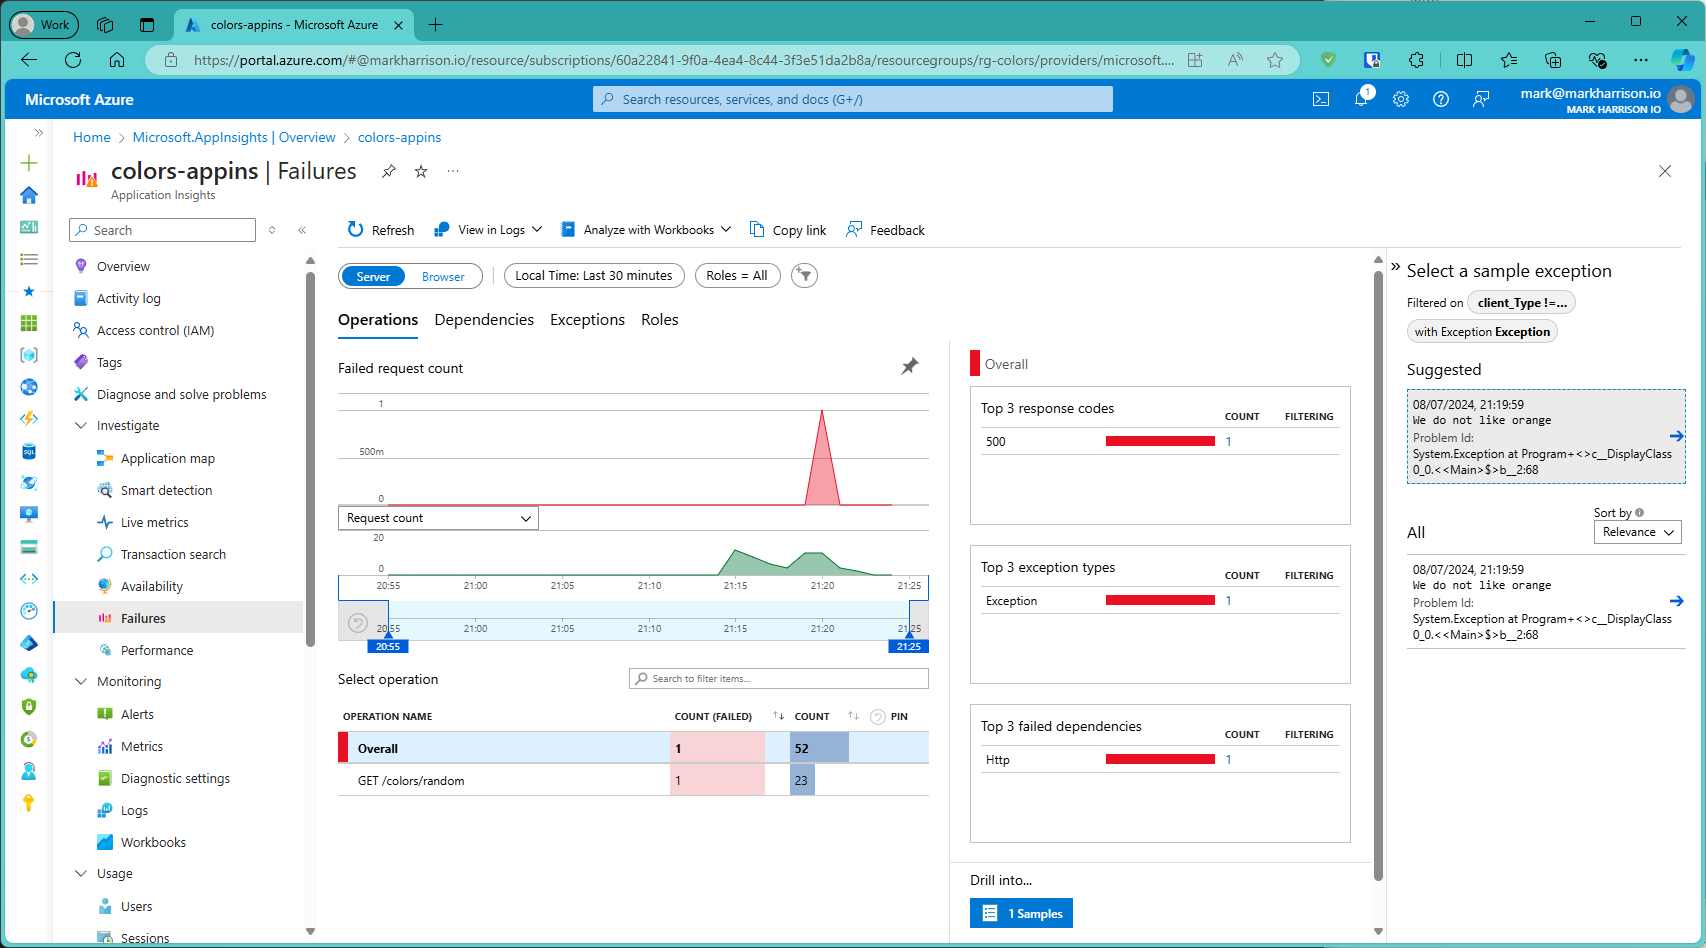
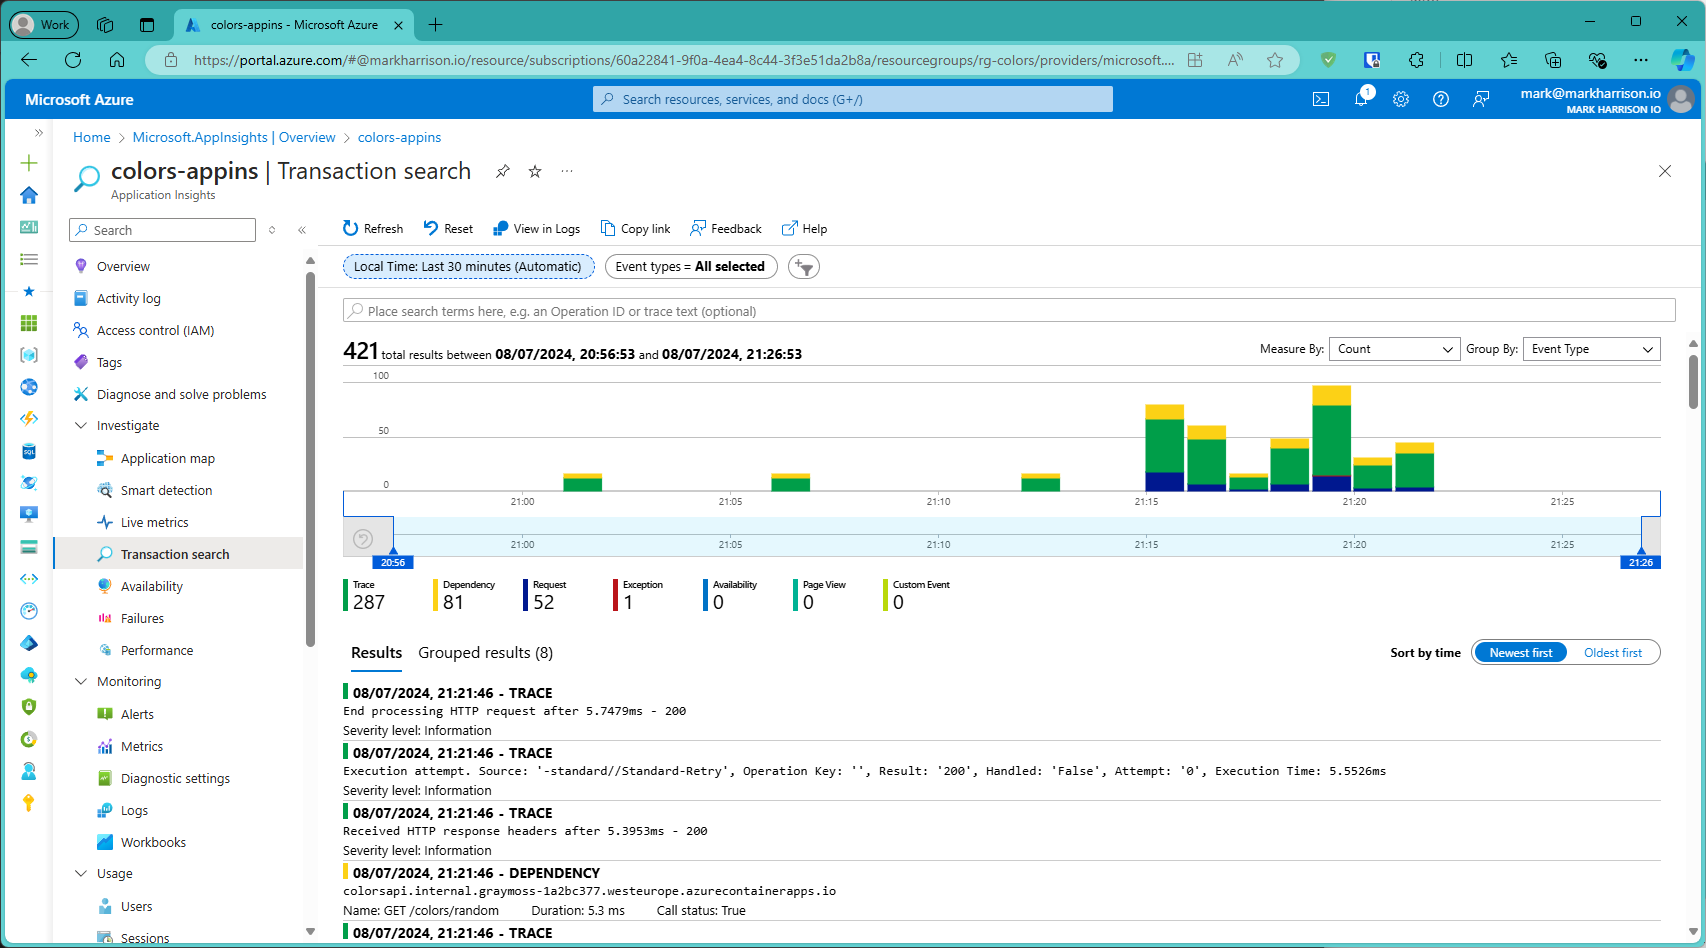
Transaction search:
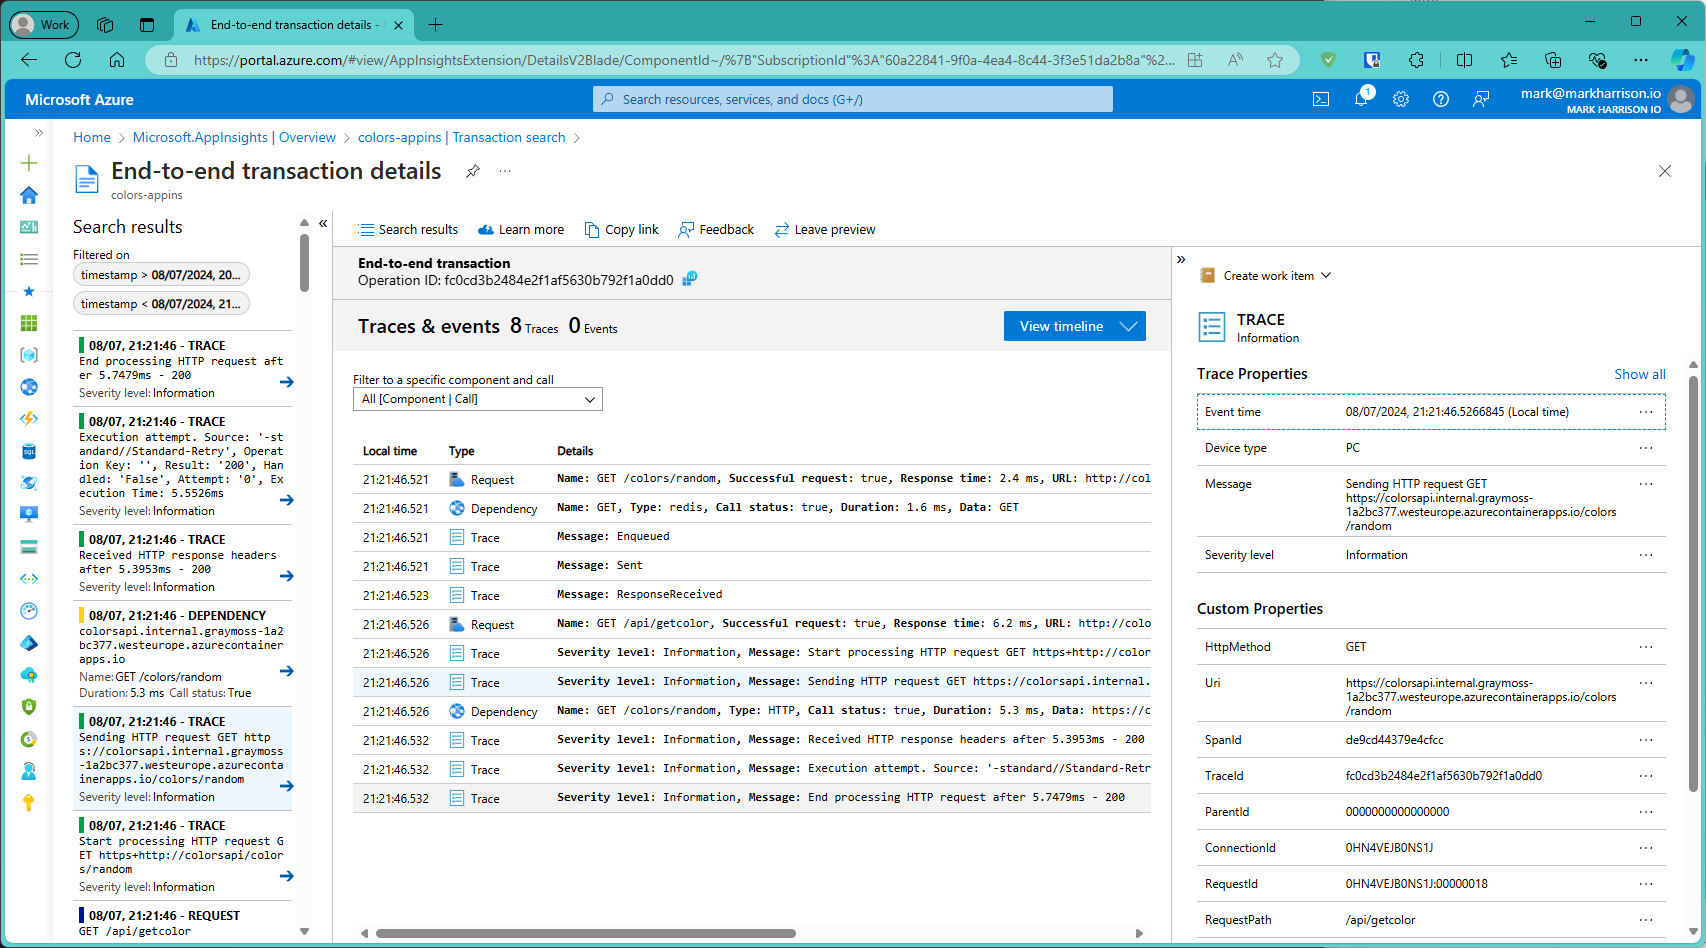
End to End transaction details:
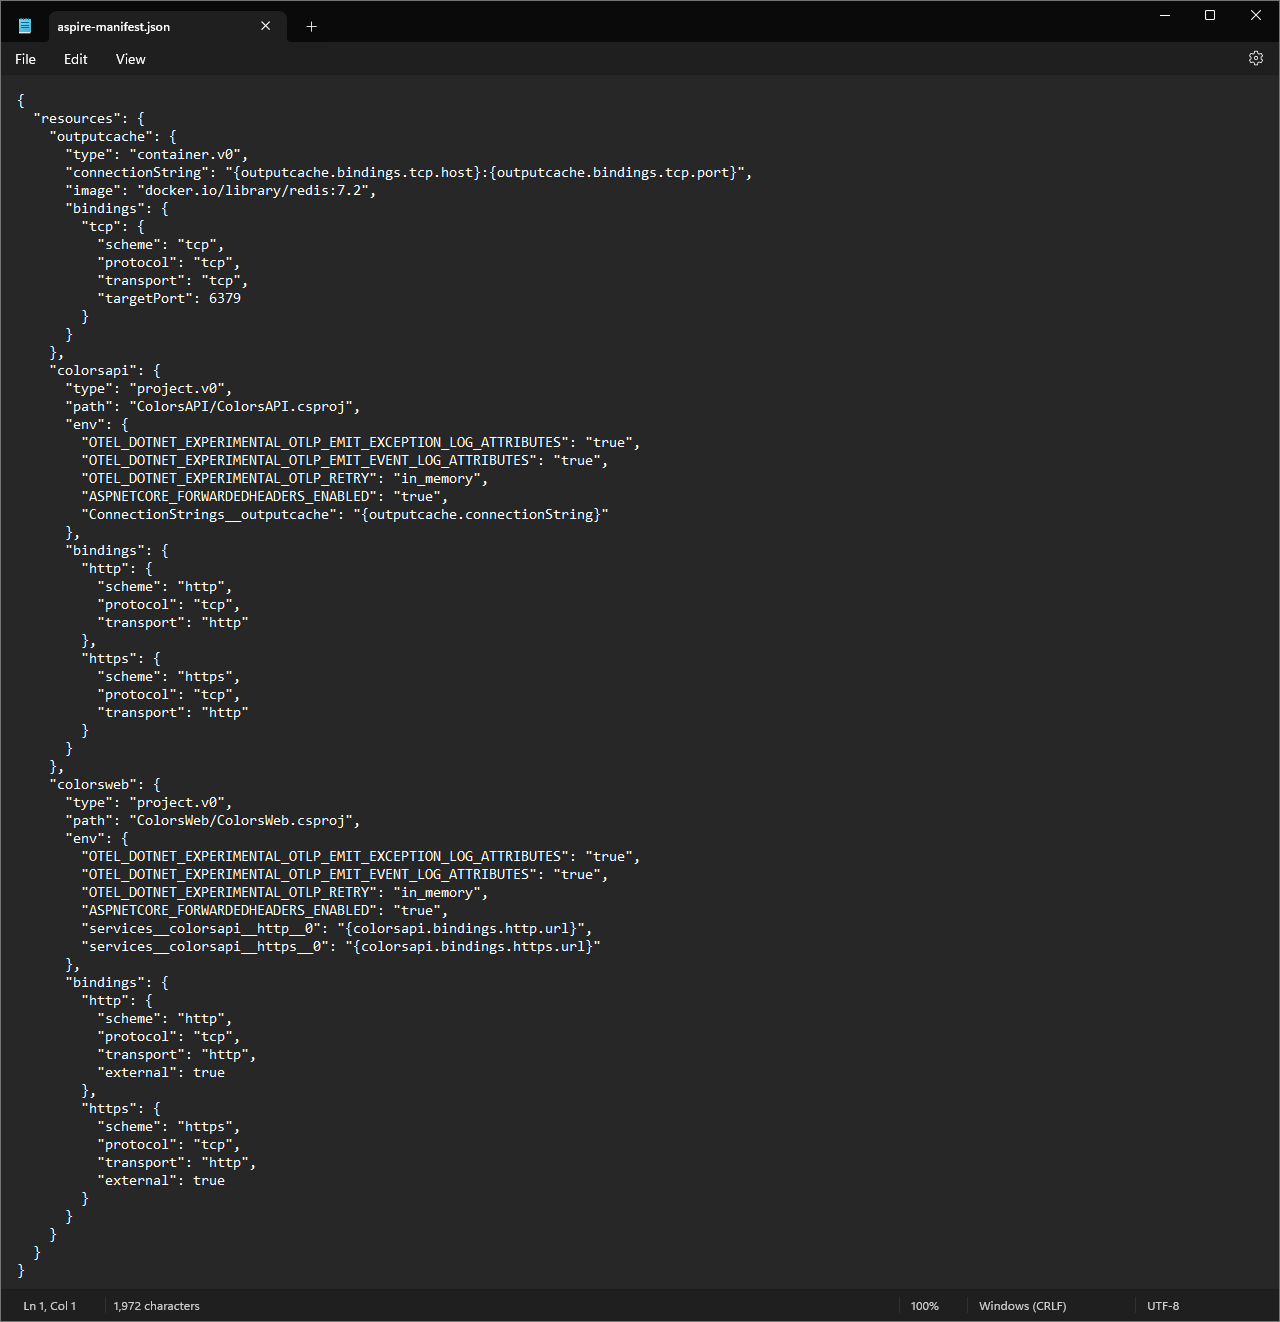
Deployment Manifest
What about targeting production environments other than Azure Container Apps?
.NET Aspire can generate a manifest that empowers tool builders to create deployment tooling. Support for other deployment environments will expand progressively over time.
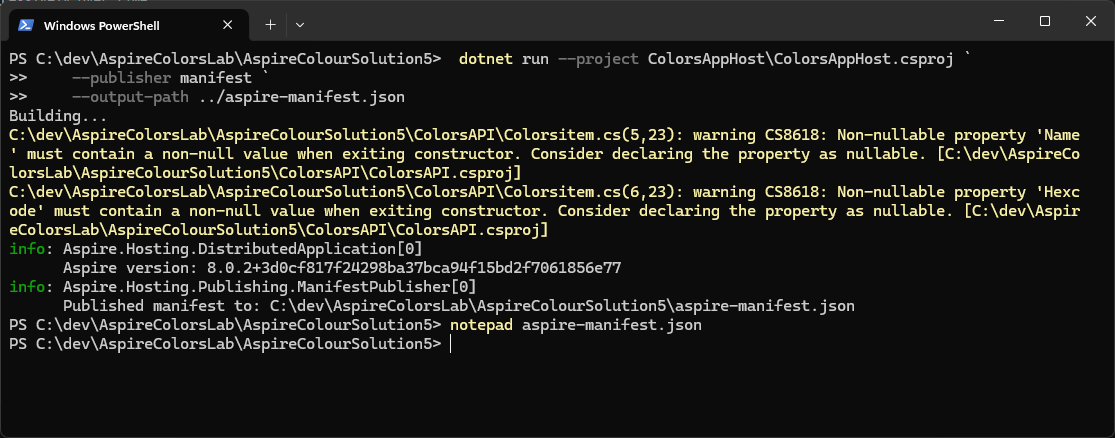
Manifest generation is achieved by running dotnet build with a special target:
- Run the following:
 dotnet run --project ColorsAppHost\ColorsAppHost.csproj `
    --publisher manifest `
    --output-path ../aspire-manifest.json
Summary
In this section we deployed our Application to Azure and set up the telemetry to be sent to Application Insights.
That concludes the lab.